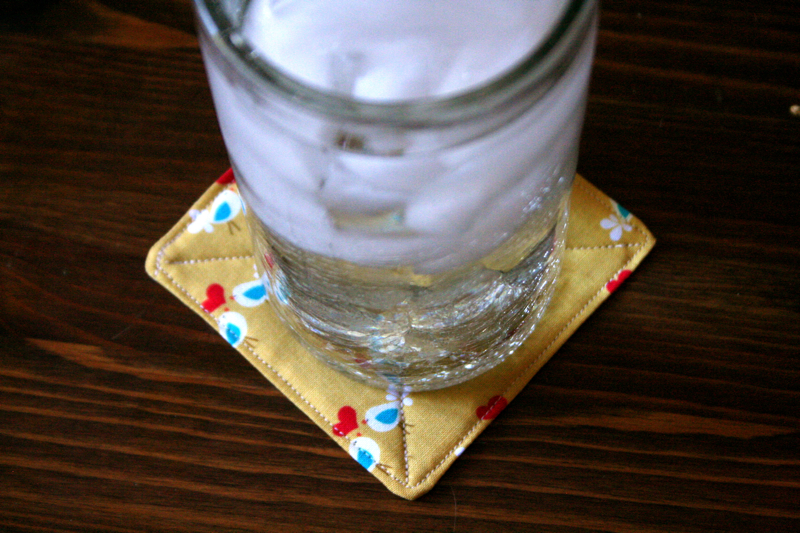
Way back when, I did a post about these cute
fabric coasters I made as a Christmas present. It was such an easy and fast project and took almost no fabric [stash buster!] that I thought it was high time for a tutorial.
I originally used batting for the inner layer of softness, but this time I tried felt since I thought it would be a more familiar material for a broader range of sewers. I used eco-felt, a material made from recycled plastic bottles. Any kind of felt would work, or any kind of batting. I bet polar fleece would work too, but I haven't tried it yet.
So the next time you need a quick, instant gratification craft project, whip up a set of these little guys to toss onto your coffee table.
Tutorial: How to Make Fabric Coasters
Materials:
2 4.5" square pieces of fabric per coaster
1 4" square of felt or batting per coaster
coordinating thread
1. Cut two 4.5" squares from your coaster fabric and one 4" square from your felt or batting.
2. Lay one fabric square down, right side up. Lay second fabric square on top, right side down, lining up all the edge. Lay felt square on top of that, centered. **NOTE: The layers aren't lined up in this picture because I wanted you to be able to see their order. Look at the next picture for how the little fabric sandwich should look.**
3. Pin the whole stack together.
4. Starting about an inch from a corner, sew around the square with a 1/4" seam allowance, stopping before you get back to the beginning so there's a 2" gap. Backstitch at beginning and end. Feel free to catch the edge of the felt in the seam from time to time if it's close.
5. Clip the corners, being careful not to get too close to the seam.
6. Turn the whole thing inside out so that the felt is on the inside. The felt isn't technically attached to anything unless you caught the edge in the seam, so be a little careful when turning it. It really isn't that hard though, the texture of the felt makes it stick pretty easily to the fabric. You'll need to use a point turner, knitting needle, pencil or other blunt point to [carefully!] poke out the corners and make sure the felt corners are all the way stuffed down in there. Press the whole thing flat and turn under each raw edge in the open section 1/4".
7. Starting at a corner, topstitch all the way around the coaster 1/8" from the edge, backstitching at the beginning and end. If your sewing machine can offset its needle, move it all the way over to the right and it will be easier to get right along the edge.
8. If you want, you can add a decorative "X" over the coaster to make it look more finished. Just stitch a straight line diagonally from corner to corner, backstitching at beginning and end, then repeat for the other two corners.
9. Your first coaster is done! Repeat for as many coasters as you want to make, then arrange them proudly on your coffee table.


I want some!!
ReplyDeleteThis is my very first time using a sewing machine. This project is perfect for me, and it will make nice gifts. :)
ReplyDeletemade some of these tonight! nice touch to the bf apartment, who kept saying he needed coasters! now he has some and we got to pick out the fabric together. fun outing!
ReplyDeletehaha awesome!
DeleteIntricately done. So neat!!!
DeleteThank you so much for this usefull tutorial! :) It really helped me! :)
ReplyDeleteHi! I realize this post is several years old, but I just found it and want to let you know that I enjoyed it and have now made some coasters. Great tutorial, thanks!
ReplyDeleteyaaay! glad you enjoyed! :]
DeleteThanks for your tutorial that I can read and not have to watch a video! Made 12 of these today (not going to quit my day job though!) Took some of the extra material, stitched together and used iron-on interfacing...not as puffy but certainly easier to turn inside out! They look fine...Thanks again, Sandy
ReplyDeleteLove them.. Great gifts you can make at the last minute.
ReplyDeleteQuick question -- do you just trim the ends of the threads when you are finished quilting the coaster or do you pull the threads through as you might when you are working on a quilt.
ReplyDeleteI just backstitch first and then trim the threads.
ReplyDeleteJust exactly what I was looking for! I need some favours for a coffee morning at church--sets of 4 of these tied up with pretty ribbons will be just the thing!
ReplyDeleteYour instructions were great. I just finished one and will make more. For the topstitching, I increased the length of the stitch and used a contrasting color thread. Thanks!
ReplyDelete