
I'm one of those people that needs a real-life calendar. Call me old fashioned, but I just can't use my phone or computer to keep track of my life. I need to SEE it all in front of me. Am I the only one?? I like to outline the weekend squares with highlighter, and sometimes I color code activities or work schedules. So lame!

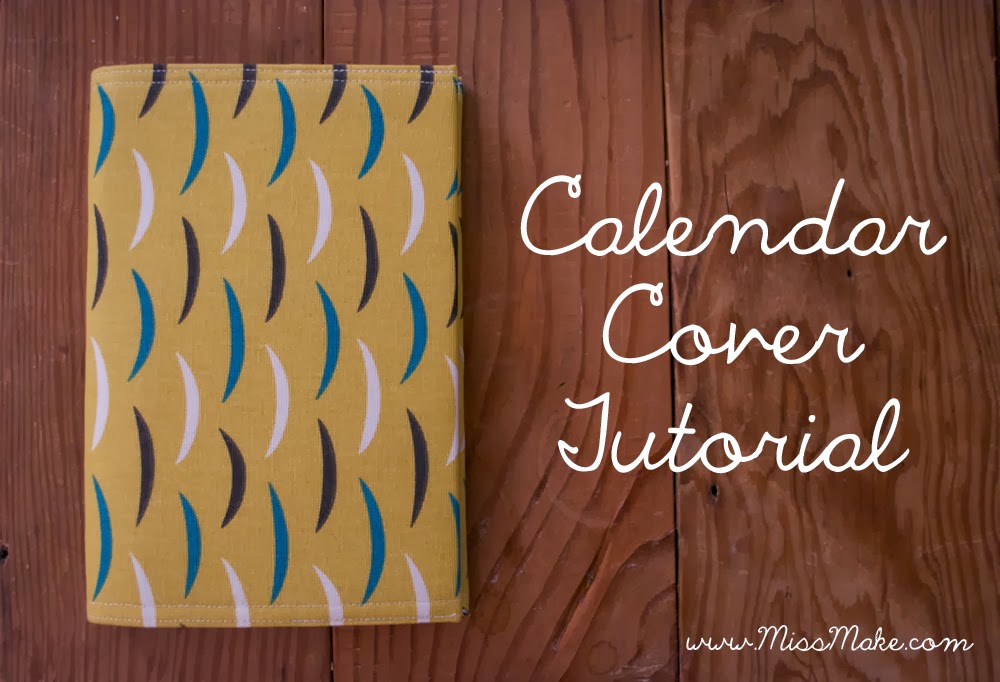
I'm always abnormally excited to get a nice fresh calendar when the new year rolls around. So many blank pages! So much potential! And the most fun part - I like to make a new cover. It's super easy, helps make it sturdier, and covers up the weird ugly plastic that most of them are made out of. This is pretty much the same idea as making those brown bag book covers for school books, except with fabric and a sewing machine.

Calendar Cover
Materials:
home decor weight fabric [amount depends on calendar size, but probably not more than .5 yard]
thread
peltex stabilizer [again amount depends on calendar size]
*Peltex stablizer is a very stiff material that's almost like a cross between cardboard and felt. It's
usually with the interfacing and other stabilizers.*
Directions:
First measure the dimensions of your calendar. Using a tape measure, measure the width of the entire thing, bringing the tape measure around the spiral portion to account for its size. This number will be called "W".

Also measure the height of the calendar. This number will be called "H".

Now we will cut the peltex into a rectangle. For the dimensions, add 1/4" to both W and H. This will make the peltex stick out just a little bit on all sides.

Next is the fabric. Since calendars come in all different sizes, I'm giving you more of a formula. Don't be scared of the equation-looking thing in the picture, it's less complicated than it looks! So the height of the fabric is easy - just add 2" to your H measurement. For the width, just add 2/3 of the W measurement to itself. So if my W was 12" I would add 8" for a total fabric width of 20". If you have numbers that are tough to divide, just round to the nearest 1/2". This does not have to be the most exact thing you've ever made [what a relief, right??].

Using your best just-eyeball-it skills, center the peltex rectangle on the wrong side of the fabric rectangle and pin it in place. Try to make it as straight as you can.

Along one of the long edges, fold and press the raw edge of the fabric towards the peltex, just shy of meeting up with the peltex edge.

Fold and press it again around the edge of the peltex.

Stitch along the inner folded edge of the fabric, all the way from one edge to the other. [You'll be starting and stopping at the edge of the fabric, not the peltex.]


Repeat with the other long edge. When you're done it should look like this:

Now we'll make a flaps for the calendar cover. Fold and press one short fabric edge about 1/2" towards the wrong side. We'll just be folding this edge once, otherwise it gets too thick. There's no need to zigzag the edge, because, after all, it's just a calendar cover.

Clip off the little corners of fabric so they don't stick out.
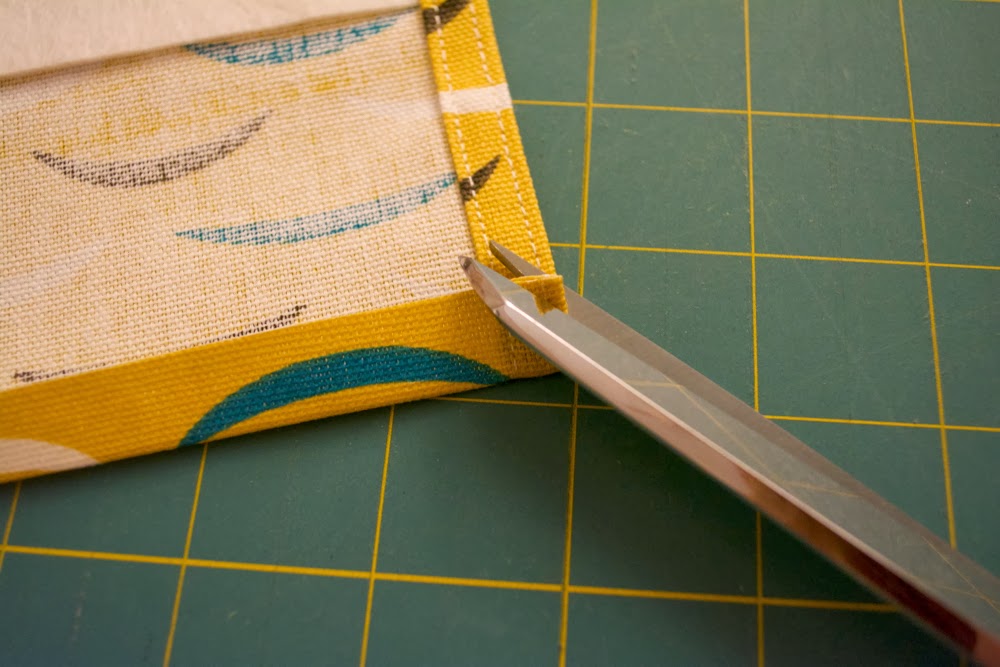
Stitch close to the raw edge of the fabric, backstitching at beginning and end.

Stitch again close to the folded outer edge of the fabric, backstitching at beginning and end.

Fold fabric around peltex, as far as it will fold it without starting to fold the peltex. Line up the stitched top and bottom edges and pin in place.

From the outside, stitch along previously sewn outer line of stitching, from the outer edge to where the folded inner flap stops, backstitching at the beginning and end. Repeat along other side.

Repeat flap process with other short end of fabric rectangle. Slide each side of your calendar cover into the flaps. Your calendar cover might be a little stiff at first and want to pop open, but it will break in with a little use and lay nice and flat. If you want to expedite the process you can place your calendar under a heavy book for a few hours.

Sources: fabric is from The Needle Shop in Chicago, IL.
Thank you so much for this! I'm the exact same way about calendars - smartphones and computers just aren't the same. I used to buy these really nice artsy ones from a scrapbooking store, but the store closed down last year, and I can't find anywhere else to buy one. I don't really like the idea of a boring one from the office supply store so this is perfect!
ReplyDeleteold school calendars rule!! :] :]
DeleteNot lame at all! I get almost giddy at the prospect of a new year, and as a result, a brand new dayplanner to fill with color coded workout/training programs, and all kinds of fun! :)
ReplyDeleteGreat tutorial. I'm featuring it on The Daily Sew on Facebook tomorrow! Welcome to Nashville, too!
ReplyDelete