

Today I'm going to explain how I drafted the hi-lo peplum that I attached to my Colette Moneta top.
This particular peplum is a full circle peplum. The process for drafting it is actually the same as drafting a circle skirt, just on a smaller scale. I'm doing it with a knit, but you could use the same drafting process for a woven.
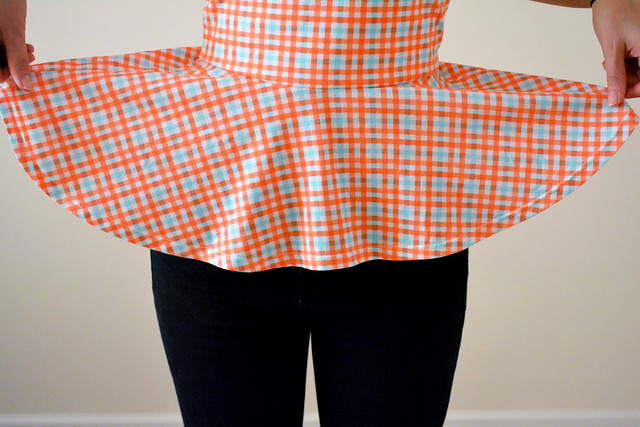
You can use this on any bodice pattern. I'm using the Colette Moneta dress bodice that I lengthened by 1.5". If you are going to do any lengthening or other adjusting of the bodice you'll want to do that before you draft the peplum.
FYI: I loved geometry in school. LOVED it. It was my favorite math. But it's ok if you hated it. I will help you navigate a safe path through its treacherous waters.
Ok here we go!
FIGURE OUT YO' NUMBERS ________________________________________________________________________________________________
Before we start, we need to figure out some numbers. First use a tape measure to determine how long you want the finished peplum at the center front [your 'hi' measurement] and at your center back [your 'lo' measurement.] Write them down. Mine were 7" and 11".

Now we need to find our circle skirt radius. Instead of doing any math we are just going to measure the finished waist size of our pattern pieces and look at a chart. Yay!
First, measure the waist seam line on both the front and back bodices. Subtract the seam allowance, add the front and back together and then double to get the full finished waist measurement. Round to the nearest whole number.
Now find your radius number on this chart and keep it handy:

All these numbers are in inches. To convert to centimeters, multiply by 2.54.
DRAFT THE PEPLUM
________________________________________________________________________________________________
Now we're ready to start drafting! First, we will draft the front pattern piece. Draw two lines that are squared, meaning a 90° angle. [I promise mine are squared, even though they don't look like it in the picture.]

On each line, measure out your radius number and mark it. Mine was 3 7/8".

Now we need to draw an arc between the lines. Place your ruler through the 90° angle and measure out your radius distance, marking a series of little lines at the corner of the ruler, rotating it a bit each time.


Use a curved ruler or other curvy edge to connect the dots.

Ok so now we have the waist edge drawn in, and we need to draw in the length of our front peplum.
Starting at the waist line, measure out the length of your peplum at center front on the vertical squared line [this is your 'hi' measurement]. Label this edge as the fold edge.

Again starting at the waist line, measure out the length of your side seam at the horizontal squared line. This should be halfway between your hi and lo measurements. Since my hi was 7" and my lo was 11", my side seam measurement is 9".

Now this next part looks kinda geome-traumatizing, but just bear with me, it really isn't that bad. We are going to mark three more places in our curve to make additional measurements, so that we can accurately draw in an arc that gradually gets bigger.
Put your ruler over the squared corner so that 1" extends over it in both directions. Mark a dot at the corner of the ruler and 3/8" from each squared line, and label each dot A, B and C as shown.

Now let's start with B. B represents halfway through the arc, or 45°. Since 45° is half of 90°, that means the measurement of your peplum length at that point should be halfway between your lengths at center front and side seam. So that makes mine 8". Lay your ruler diagonally with the edge passing through BOTH the square angle and your B dot, and measure out the peplum length distance from the waist edge. Mark it.

The other two dots are again halving the distance. So for A, lay your ruler through the square and the A dot, and measure out a peplum length that's halfway between your center front and B measurement. Mine would be 7.5".

For the C mark, it's the halfway point between the B mark and the side seam. Mine is 8.5" there.

[Note: For all of these measurements I was putting a mark at the '0' on the ruler, which is not visible in the actual pictures because I wanted to be close enough for you to see the ruler placement.]
Once you have those five marks, you have enough information to draw a curved line that gradually gets further away from the waist as it moves from center front to side seam. Use a curved ruler or other curvy edge to connect them. I used a big embroidery hoop that I gradually turned as I drew.

Almost there! Add a seam allowance to your waist edge and side seam edge [I did 3/8"] and a hem allowance to the bottom edge [I did 5/8"]. I wouldn't do more than 5/8" for the hem allowance because of how curved it is. Don't do anything to the fold edge.

Label and cut out your pattern piece.
Now repeat the process to draft the back pattern piece. This time, the fold edge measurement will be the measurement at the center back - so your 'lo' measurement. You will gradually decrease the peplum length the same side seam length that you used on the front pattern piece.

SEW THE PEPLUM
________________________________________________________________________________________________
Sewing the peplum is much less complicated than drafting the pattern pieces. Whew!
First, cut out one front and one back along the fold. Pin them right sides together along the side seams and sew.

[Handle the pieces VERRRRY carefully as you work with them, as it's very easy to stretch the curved waist edge out.]
To help reinforce your waist seam, use a large zig zag stitch to baste clear elastic to the wrong side of the peplum waist edge. There is no need to measure or stretch the elastic as you sew. [I basted mine 1/8" in from the edge because that's how much my serger trims off when I sew at 3/8".]

Pin the waist edge of the peplum to the bottom edge of your finished bodice, right sides together. I like to line up the side seams and centers front/back, then work on the four divided sections one at a time.

Find a giant kitten-beast and drape him across the table next to your pinned peplum, directly in the space in which you're trying to work.
[Note: This step is optional]

Sew the peplum to the bodice.

Yay! Peplumified!

Now all that's left to do is the hem. Here's a tutorial for hemming knits with a twin needle posted on the Colette Patterns blog.
Look! We made a circle!

I hope this was helpful and clear enough for you. If you have any questions please ask away in the comments!
Thank you so much for taking the time to post this!! The Moneta is proving to be one versatile pattern. I can't wait to make a peplum top soon! Also - your cat is so hilarious, seeing your cat pics makes me wish I had a little kitten to "supervise" while I sew. (My dogs are not allowed in the sewing room - they're not really as delicate as a cat would be - more like 2 big bulls in a china shop). :P
ReplyDeletehaha i can only imagine - sometimes Hootie is banished from the cutting table, but I have to provide him with a little pile of fabric to lay on as a compromise.
DeleteThis is a GREAT tutorial! It takes a lot of time and effort to make, so thanks! And your finished top is freaking adorable!!! :)
ReplyDeleteyaay thanks! i hope it's useful!
DeleteTHANK YOU SO MUCH
ReplyDeleteLove this tutorial! I followed it last week, and now I have my new favorite fall top! I just blogged about it here, if you're interested: http://thecreativedomestic.com/2014/09/the-confidence-get-up/
ReplyDeleteThanks for the great tutorial--it worked wonders!
YAAAAAY!!! going to look now...
DeleteThank you so much for a very clear instructions! I'm still learning to use a Lycra or jersey kind of fabrics but you make it look so easy. I will definitely give it a try.
ReplyDeleteI love this style :) can't wait to try this dress, looks easy and oh so cute..
ReplyDeleteThanks for the tutorial! I've designed my pattern to match the renfrew bodice albeit 2.5 inches shorter. How much fabric did you end up using for yours? I'm excited to get mine started! Thanks again!
ReplyDelete