I've been working like a maniac to get ready for my trip. Most of it has been legitimate things like the finishing of work assignments and the arrangement of flora/fauna care. But also some of it has been deliciously stressful self-imposed project deadlines. One of those things was the Colette [Walden] Cooper Bag.
I know the Cooper was mentioned as almost an afterthought on my travel sewing plans post, but it got bumped up on the list for a few reasons. First, I definitely need a day bag when I'm there that's big enough for things like my camera. The only bags I have like that right now are regular backpacks and big open tote bags, neither of which are the most secure things to carry around in crowded touristy places. Second, the wonderful and local The Fabric Studio has hard copies of the pattern, so I didn't have to print and tape together the PDF. [This one probably wouldn't have been that bad to tape together, but I just didn't feel like I had the time.]
The final thing that convinced me to pull the trigger was that there was both a messenger bag and a backpack view. I wanted messenger bag capabilities for those crowded places so my stuff was in front of me. But I also didn't want to commit to just messenger bag, because my shoulder gets tired and achy wearing one all day, and I think backpacks are way more comfortable. So even though they were separate views, I thought...maybe I could combine them?
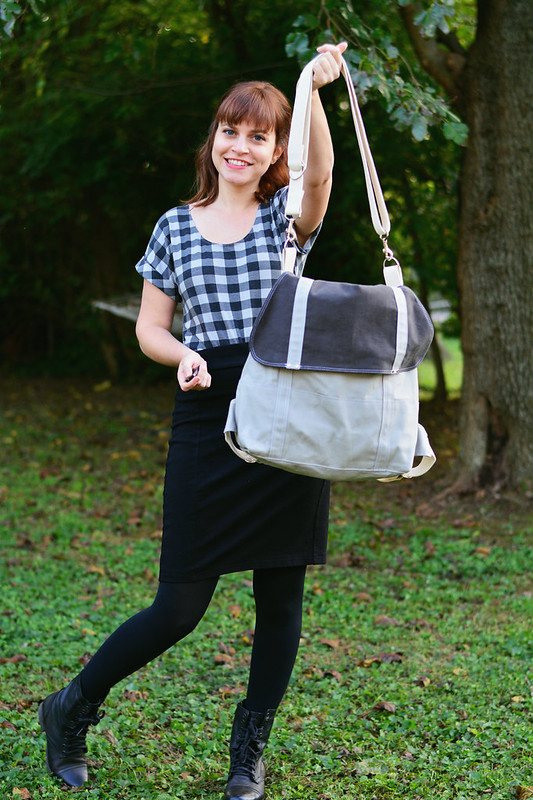
So I combined them!
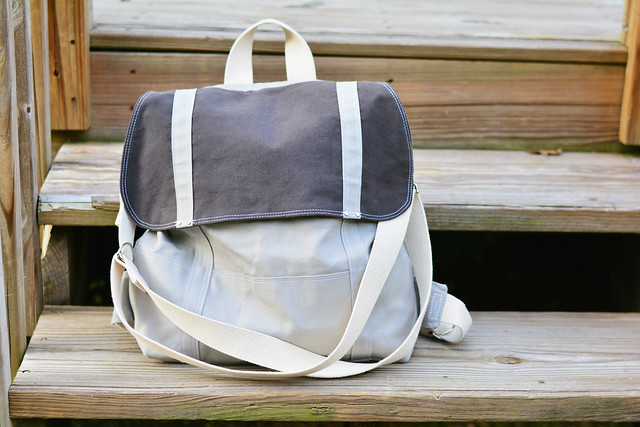
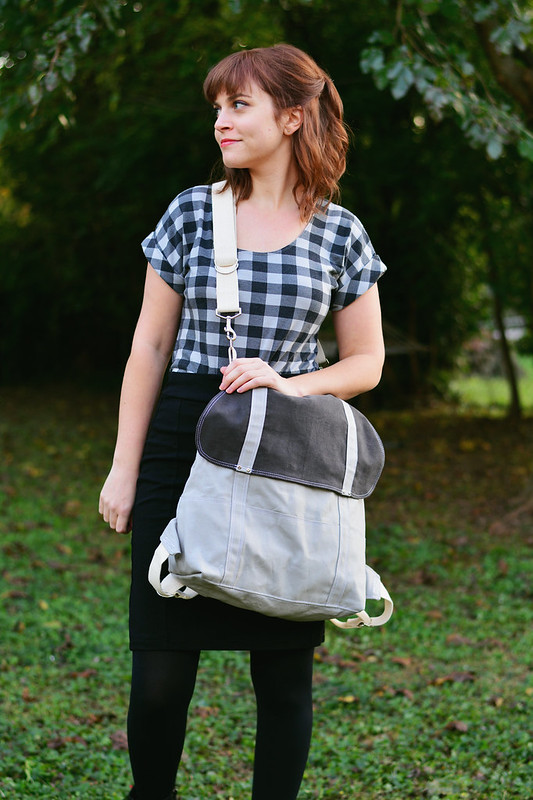
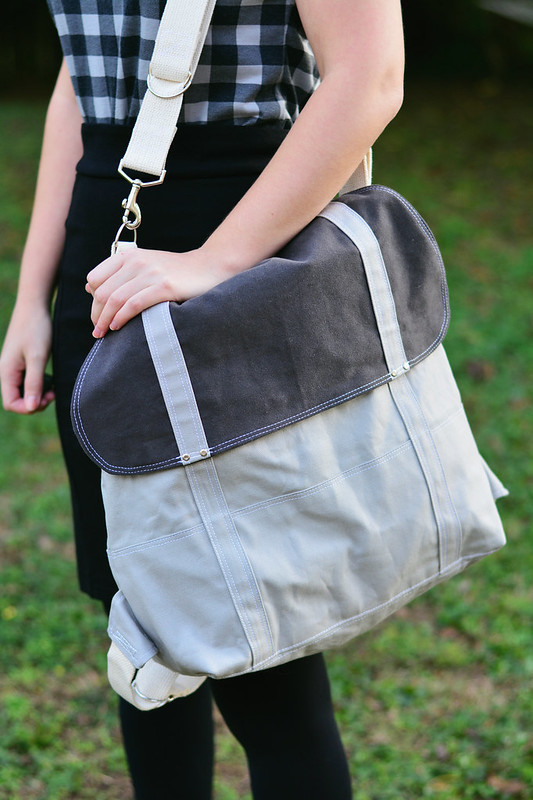
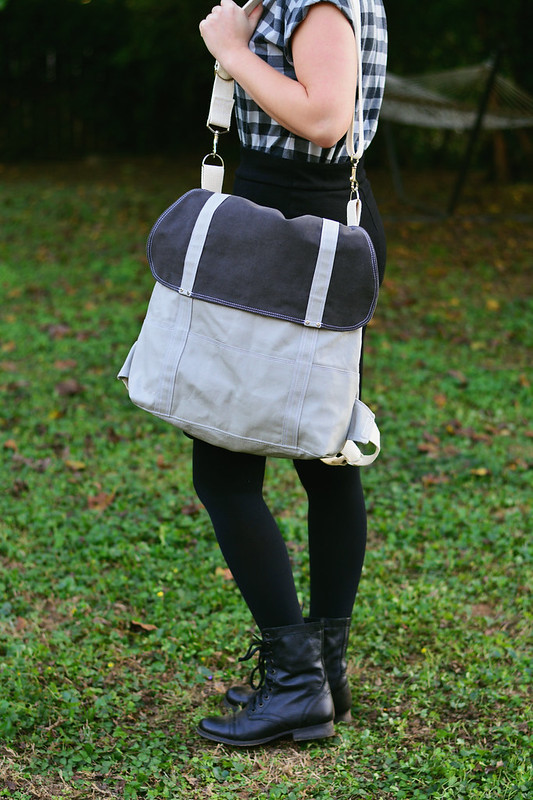
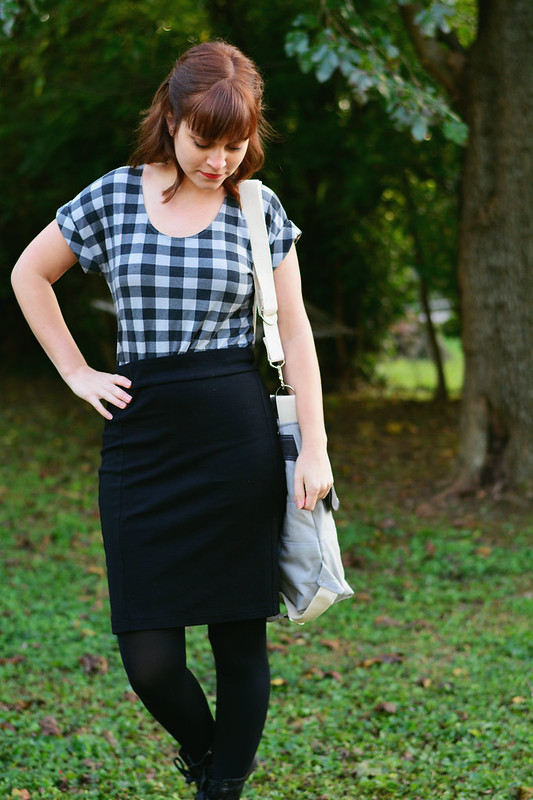
I can wear it as a messenger bag when I feel like I need to.
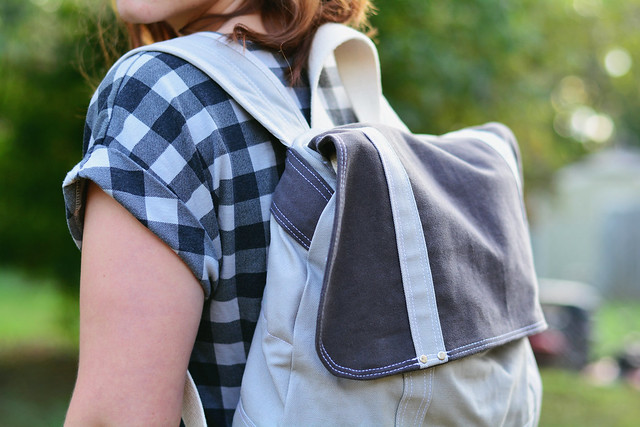
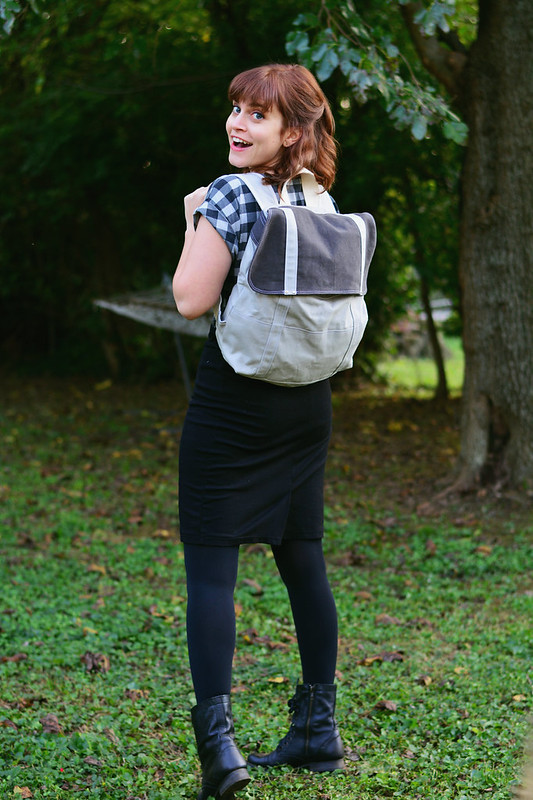
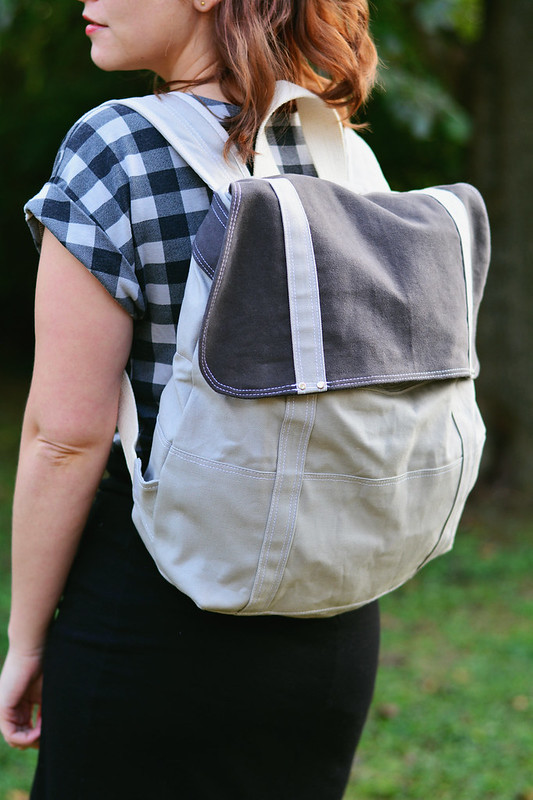
But for when I get sick of messenger and want backpack, I made the shoulder strap removable with swivel snaps, so I can take it off. It can also be tucked down under the top flap. Either way, it then becomes - backpack!
I wish I could go so far as to say it was convertible, but I can't really. When it's a messenger bag the backpack straps are still there, just kinda dangling. They don't really get in the way, but I'd love to make another one and figure out how to make it truly convertible. Like maybe they could unsnap and be snapped on somewhere else to go from backpack straps to shoulder straps.
But this was not the time for major experimentation.
I did do a lot of smaller experimentation though, which I am about to bore you to tears with! First, the fabric details:
Outer: gray canvas duck from JoAnn
Flap: Robert Kaufman Chamonix moleskin [scraps from my bomber jacket]
Webbing: 1.5" cotton webbing from JoAnn
Hardware: The Buckle Guy [really good for hardware, has tons of swivel snaps and rings and slides, check them out!] and JoAnn [last minute D-ring crisis, and rivets which are in the leather aisle BTW]
Lining: cat corduroy, gifted from a friend!
Other: cotton batting for padding, Pellon 809 in flap
So most obviously, to do the messenger/backpack duo I just added the messenger bag strap to the backpack view. The bag parts for both are nearly identical, they just have different straps.
The bottom panel that you see on the front is supposed to be an open exterior pocket, but I knew I wasn't going to put anything in there because it would fall out/get stolen, so I skipped the pocket. But I still added the panel because I thought maybe it added strength. Or something. I just stitched it down along the top.
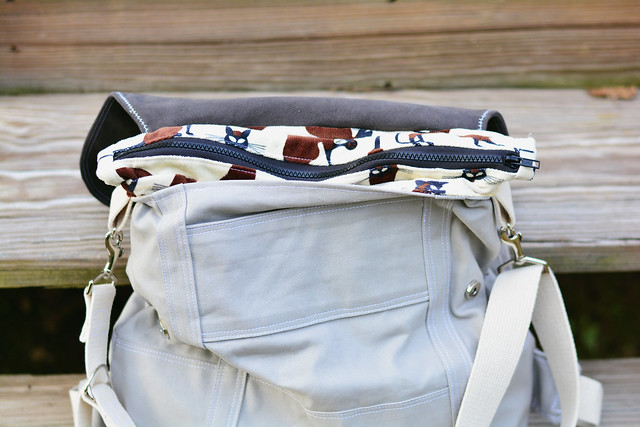
I did include the top exterior pocket, which is only visible when the flap is up. Again I probably won't use it, maybe for chapstick or something, but I like how it looked. But then, as I was turning the whole thing right side out, I was yanking on the pocket, quite stupidly, and I actually half pulled it out on one side. It's held down by topstitching, so the only thing to do was rip out a little bit of the topstitching and redo it, which was really hard once the bag was all together and impossible to do without it being noticeable. So yeah, don't pull on the pocket when you're turning it!
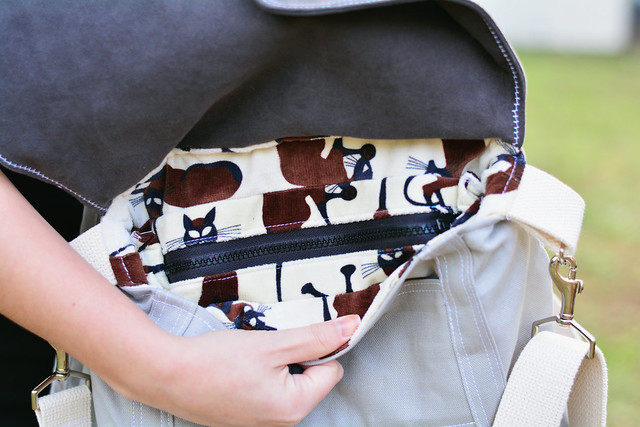
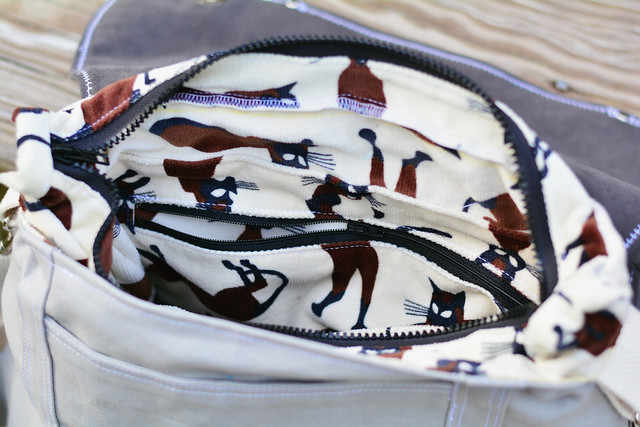
I also added a zipper to the inside. Although the flap is pretty big and secured with magnetic snaps, I still wanted to make sure my stuff was safe. I used a 14" separating sport zipper and sewed each side in the middle of two 1.5" wide strips of lining fabric. Then I sewed some little tubes and folded/stitched them around each end of the zipper. I serged the raw edges and them stitched them to each side of the lining 2"-ish down from the top edge.
It worked pretty well, except that I should have used a 12" zipper. It's too long for the space. It was fine when the lining was flat but I didn't account for the way the webbing tabs make the lining form a square shape at each end. It only affects functionality a little bit, it's mostly just mildly irritating. You know, one of those things. There's probably a tutorial somewhere that would have told me this, but NO TIME FOR THAT!
Yup, too long:
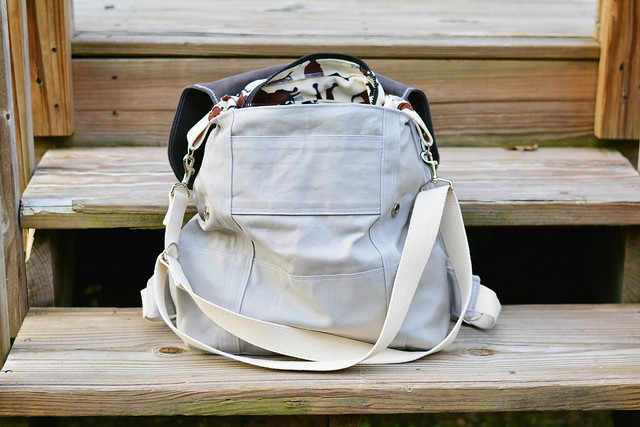
Here's the inside - LOOK AT THE LINING! This is an amazing corduroy cat print fabric that my friend and past co-worker Rebecca gave to me. Isn't it so cute?? I only had a yard, otherwise it would have already been pants or something. [I actually did consider shorts, but I think this is a better application.] It's so soft and snuggly!
Inside I made one of the pockets a zipper pocket so that I have a place for the important stuff.
I was also excited to use the cat fabric because of Erin's Cat Lady Sewing Challenge on Miss Crayola Creepy! Basically it involves sewing something with cats on it during the month of October. I think it was supposed to be a garment, but I say these cats meet at least half the challenge!
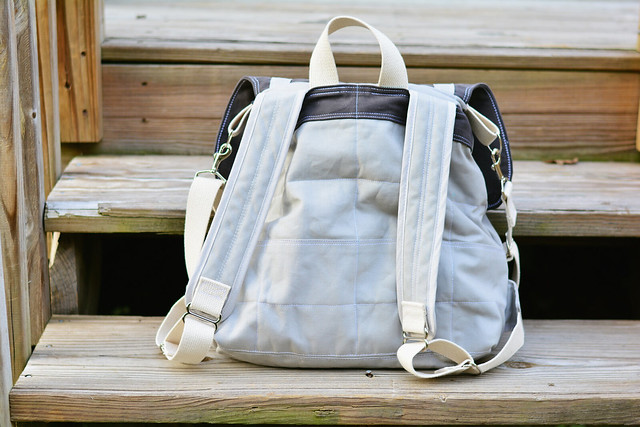
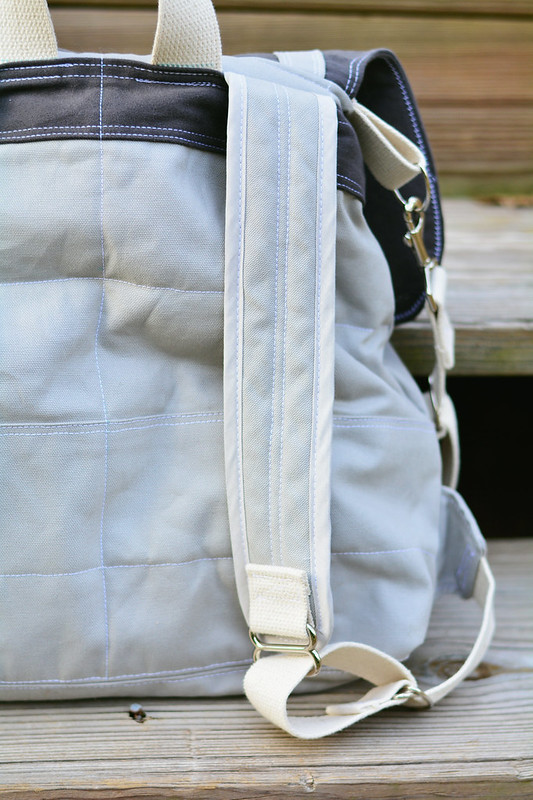
Now let's talk about the back. I added some padding to the back panel, because I was looking at a backpack I had and realized, oh yes, all backpacks are padded there.
After the straps were attached to the back piece, I put two layers of batting behind it and did a little quilting to attach it. It would probably be even better to use a really thin piece of foam, but I didn't have a really thin piece of foam. I did, however, have copious amounts of batting scraps. Years of them. I always get really excited when I can use them.
And now on to the straps. The pattern just has you use webbing, but I really wanted legit backpack straps. I basically copied the straps from my handy dandy Target backpack.
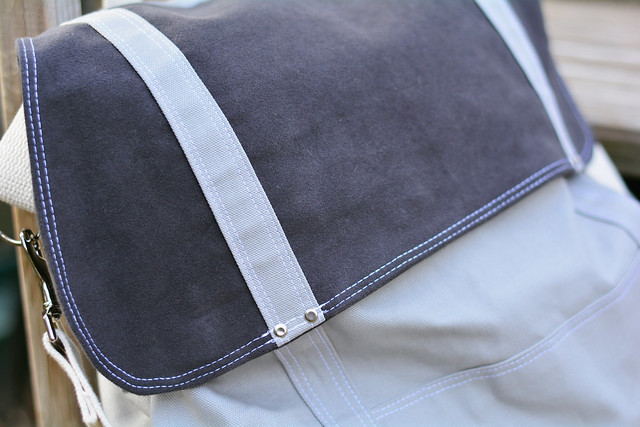
Last thing to talk about is the flap. I interfaced the outer flap with Pellon 809, which is super stiff. The moleskin was pre washed and soft and I didn't want it to be too floppy. For the topstitching, first I tried to sew two separate lines but it looked godawful so I ripped it out. Then I used a twin needle, which was great for being even except that I didn't think about how it would look from the other side, which is not the greatest. I also didn't think about how when I punched the hole for the rivets, it would cut the bobbin thread of the twin needle, and unravel it. So I had to repair more topstitching. Not too noticeable to a random person, but still makes me grrrr.
Overall I'm SO happy with this bag! I can't want to use it. The process wasn't difficult as far as knowing what the steps were, but there were a few times when my machine just couldn't sew through something. I was realllly wishing I had some kind of mega industrial machine when I was sewing the lining and exterior around the top. And to make matters worse, my Pfaff is having issues [I think I messed up the bobbin tension because I was fiddling with it, whoops] so I had to use my Singer, which is just so weak when it comes to heavy duty fabrics.
And oh, by the way, what skirt is that I'm wearing? It's an previously unblogged Mabel skirt that I'm still not sure about. I never know what to wear it with. I tried tucking tshirts in but they showed through all lumpy and bumpy. It's also kind of outside my normal style comfort zone.
Then today it was cold and I put on tights and suddenly realized - CONTROL TOP SOLVES EVERYTHING. If you tuck the t-shirt inside the control top, the lumps and bumps get smooshed away.

Crickey that bag is epic! Clearly made even more epic by the lining. Awesome job.
ReplyDeletethanks!! i owe most of it to the kitty cat corduroy. :]
DeleteI really like the changes you made to your Cooper. I have wanted to make a messenger/backpack version as well. Thanks for the tips about the zipper and straps. Enjoy your trip. :)
ReplyDeletethanks! i think it would be so cool if there was a way to make the backpack straps turn into the messenger straps. tell me if you make one!!
DeleteWow, this bag is a masterpiece! I love all the details you've added, especially the strap padding, the awesome cat lining (!!!), and the security features. I'm sure Erin will make an exception for the cat lady sewing challenge considering how epic that fabric is. Wear your new bag with pride! :)
ReplyDeletethank you! :]
DeleteDid you make your shirt? Either way it's super-cute! I thought it was a Sewaholic Belcarra at first because of the cuff, but then noticed there are no seam lines for the sleeves. Also, great bag!
ReplyDeletei did make my shirt! i'm actually going to talk a bit about it in a post on thursday, so stay tuned! it's a really great buffalo check knit from Wanderlust Fabrics.
DeleteWhat a great bag! So good!
ReplyDeletethanks! :] :]
DeleteLOVE this bag! Can I have it please?
ReplyDeleteVERY impressive bag!
ReplyDeleteAwesome bag! And yes to control top tights - they solve evvvvverything! ;)
ReplyDeletebeautiful! i love that it's versatile-- and obviously the cats!
ReplyDeleteThere are some variations that are fitted with not necessarily flap in any way and therefore are opened through the leading by a scoot. Many messenger hand bags have got purses for the flap be it modest, big, horizontally or top to bottom.
ReplyDeleteI love this bag! I've just bought the pattern because my existing bag is worn out and I decided to MAKE a replacement, and this has given me so many ideas as to how to improve it slightly. And I love your top too!
ReplyDelete