
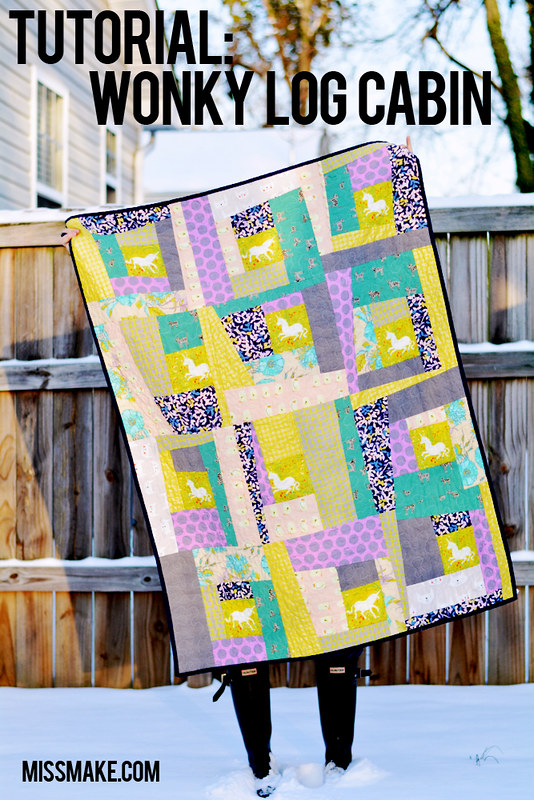
I haven't made a quilt in a really long time. I missed it! It's so much different than making clothes. The way I usually go at it, it's not unlike a grown up version of cutting up construction paper and gluing it to something [to be honest that sounds fun to me too] except that you're using pretty fabric.
A childhood friend is having her second baby in April and she requested a quilt. This is the result, and it's currently on its way to Belgium [her husband is in the army] in anticipation of baby girl's appearance in April.
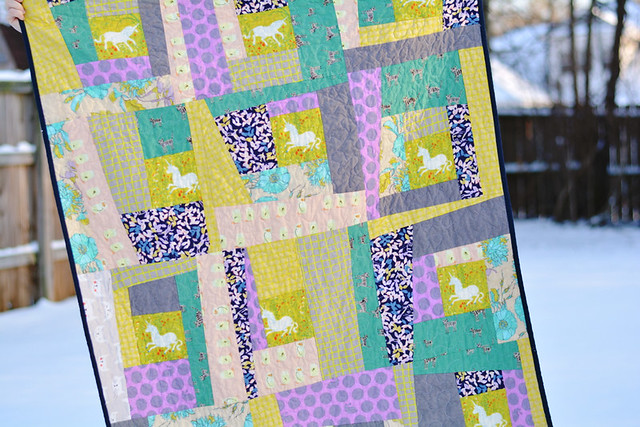
She wasn't set on any particular pattern, so I decided to do my trusty wonky log cabin block. Nothin' like some trusty wonk. It's the same pattern I used for her first baby's quilt [blogged here] and also a class I taught a couple times at Sew LA. And I'm also now remembering I made one for my brother that I never blogged. Like I said, trusty.
This is the color scheme she sent me:

I pulled most of these fabrics from my stash, with a few supplemental purchases from The Fabric Studio. The center for each block is a Heather Ross double gauze unicorn. This is fabric I have been hoarding since its first release in 2008-9[?]. Surprisingly, I did not have to rip it violently from my own rabid grasp, I was actually really happy to be able to use it on a special project like this. I also used some of my Heather Ross tadpoles-in-jars fabric, from the same era and hoarded with equal fervor.
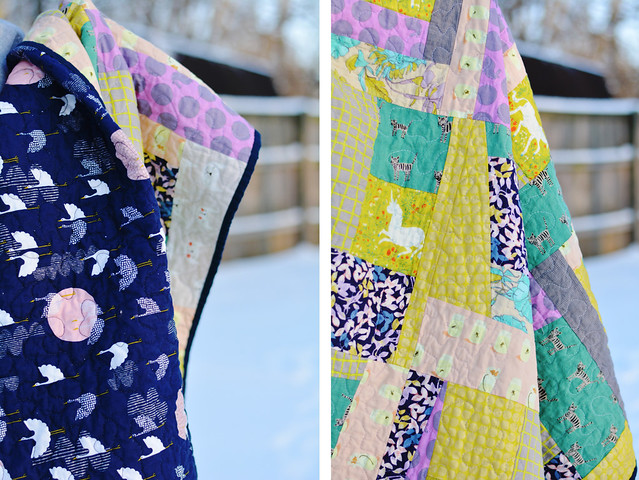
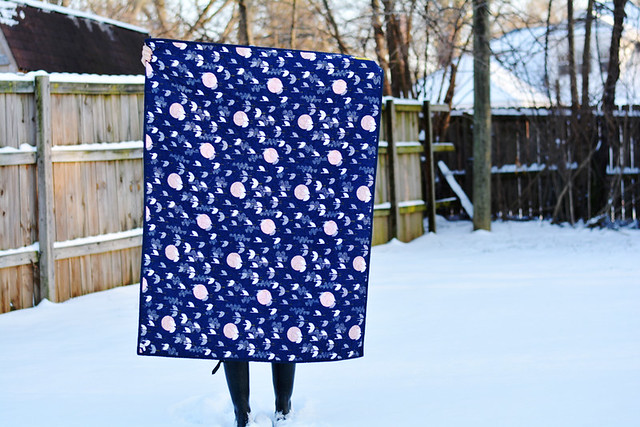
There are a couple Cotton + Steel gems in there, because their fabric is woven from secrets and magic and goes with everything. For the back I used Rashida Coleman-Hale's navy crane fabric she designed for Cloud 9. So pretty!
If you're a garment sewer and you're thinking about making a quilt, maybe try this one! It's really so fun and easy, and you barely have to do any initial cutting. All the crazy shapes are just made by attaching some strips crooked on purpose. I thought I'd write up a tutorial in case anyone is interested; I'm sure there are many already out there, but here's another! And it includes fabric yardages for making this size quilt, which is a generous crib size or a small throw/lap quilt.

MATERIALS
To make a quilt of this size [about 40x54"], you'll need:
- 3/8 yard of eight different fabrics [this is the bare minimum, for extra fabric safety you can get 3/4 of one or two]
- twelve 5" squares for the centers [to fussy cut, cut a 5" square in a piece of paper and use that as a stencil to mark your fabric]
- 1 5/8 yard for the back
- batting
- 3/8 yard for the binding [if you do 2.5" wide cross grain binding]
CUTTING
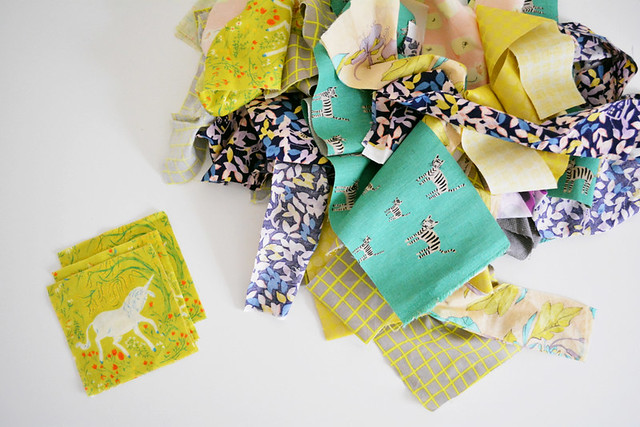
From each of the eight fabrics, cut one selvage-to-selvage strip in each of the following widths: 2.5", 4", 5.5". Fluff them into a big pile [optional].
ASSEMBLY
A log cabin block is a center square to which strips of increasing length are attached, in clockwise or counter clockwise direction, until the block is the desired size.
For the first pass around the center square, we're going to be straight with our piecing and save our wonk for later. I felt that after taking the time to fussy cut the centers, I didn't want them to end up a weird size and/or accidentally amputate unicorn limbs.
So take a center square and grab a strip - any strip - from the pile. Place the strip along the top edge of the center square, right sides together, with the selvage end hanging off over the edge a bit. Pin.
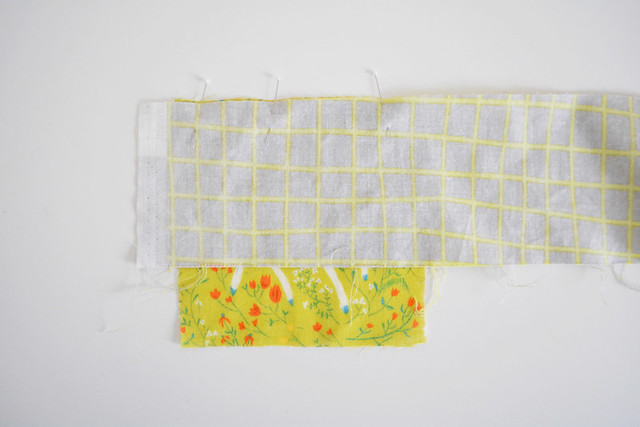
Set your stitch length at 2.0 [this means you don't have to backstitch]. Stitch along pinned edge. You only have to sew the length of the center square.
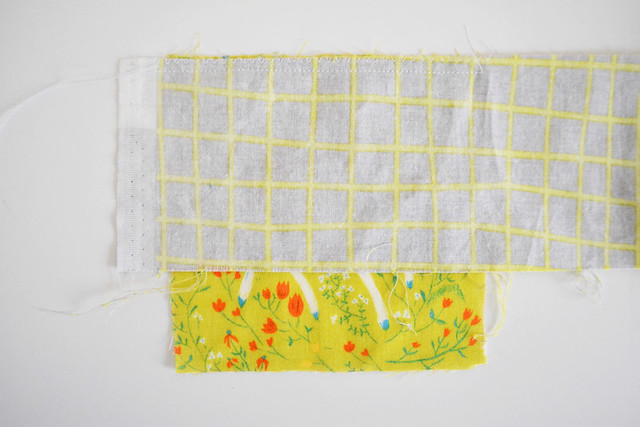
Note: Normally you don't zig zag when piecing a quilt, but my center square is double gauze, and I know from a previous Terrible Incident that 1/4" seams on double gauze tend to fray completely out during the first quilt washing if they aren't well reinforced, which leads to anger, then weeping, then complete and utter brokenness [though that quilt did end up with some pretty sweet patches]. So I zig zagged.
Press the strip away from center.

Trim both ends even with the edges of the center square.
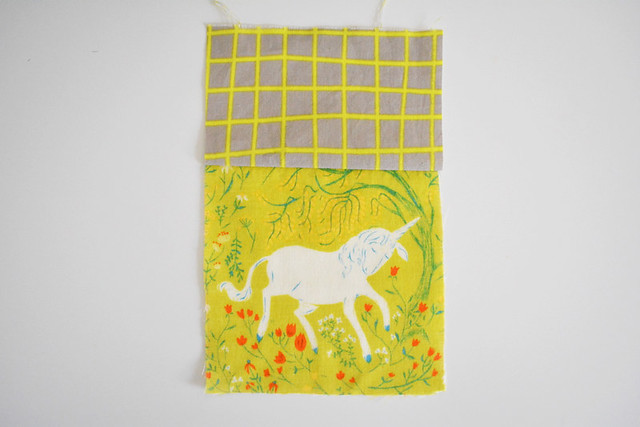
Pick another strip - again, any strip - and align it with the new left edge you just created that includes the center square and strip #1. Pin right sides together, again having the selvage hang over the edge.
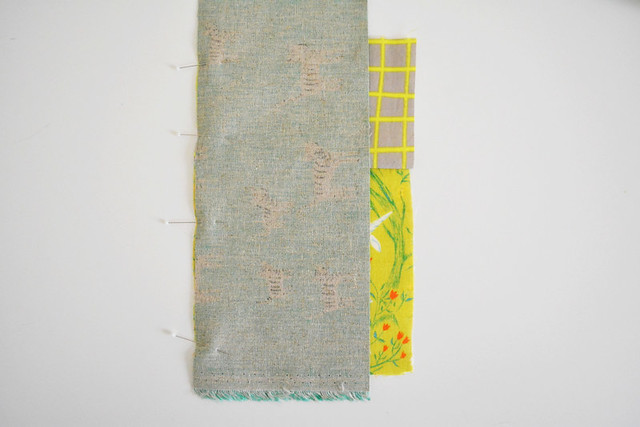
Stitch with a 1/4" seam allowance.
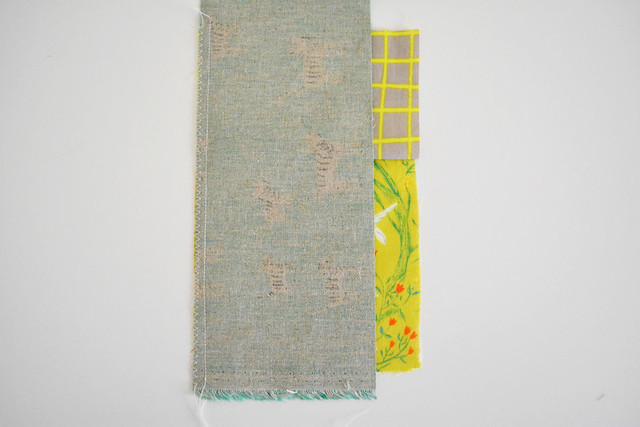
Repeat the pressing and the trimming like you did on the first strip.
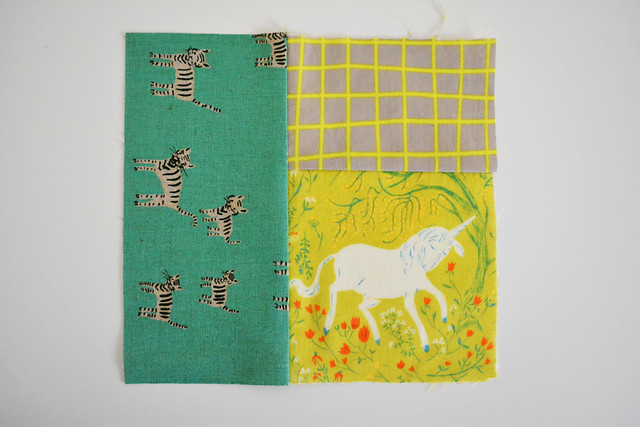
Pick a third random strip - seriously, don't think about it too hard - and align it with the bottom edge, right sides together. Are you sensing a pattern here?
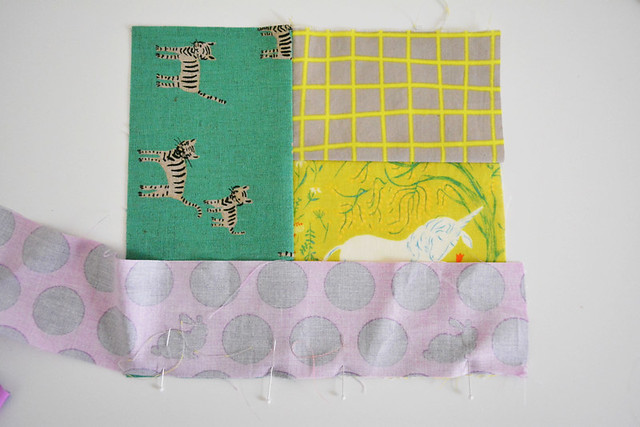
Press and trim.
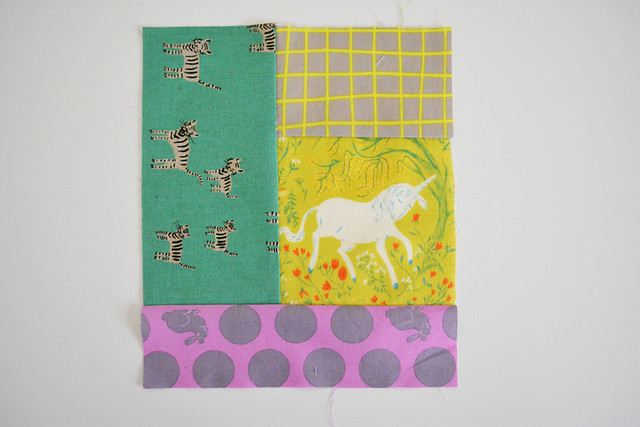
Attach a fourth strip to the final edge. That completes the first pass around the center.

Ok, now it's time to reach down deep and release your inner wonk. We're going to keep attaching strips in the same way, but we're going to start making some of them crooked. On purpose. WHAAAT??
So we're back to the top edge. Pick a strip and place it, right sides together, along the top edge, but lay it at an angle. You could go like this:
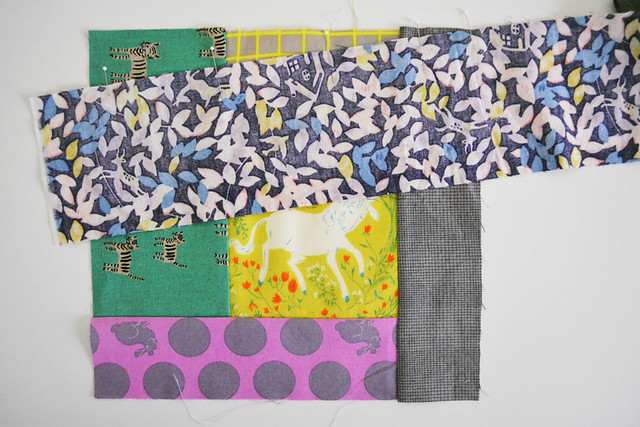
or this:
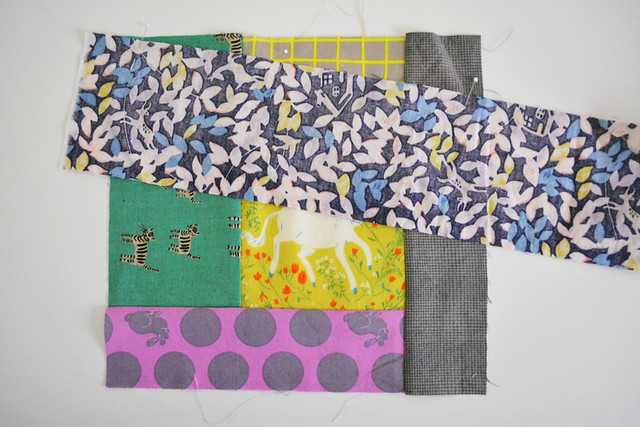
YOU ARE A CRUSHER OF PARADIGMS AND A GODDESS OF CHAOS.
There's really no rule for exactly how crooked to make the wonky strips, except that if you make them too crooked, you're going to start covering up too much of the previous piecing, so keep in mind what's going on under the strip. Also, if you make them just barely crooked, the wonkiness won't be very noticeable in the final project. About 1" [give or take] in from the edge at the crooked end is a good place to start if you need numbers.
Once pinned, stitch along the crooked strip, 1/4" in from the edge. Your presser foot should have a groove or notch at 1/4" to use as a reference.
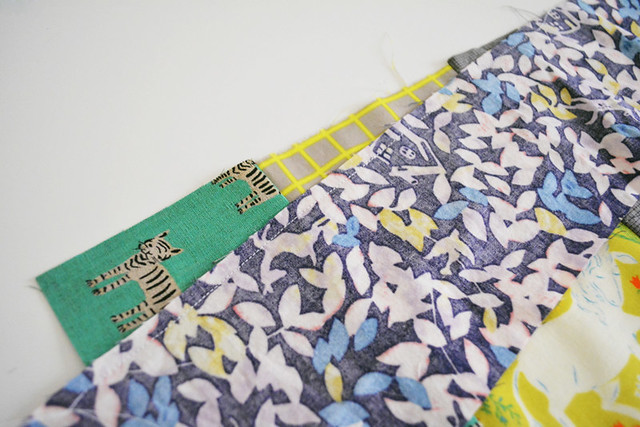
Trim the bottom layer even with the crooked strip.

Press the strip away from center. Use a ruler to trim the ends even and straight with the other edges.
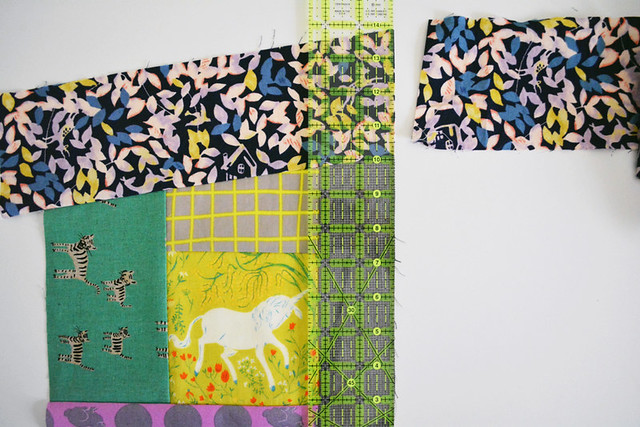
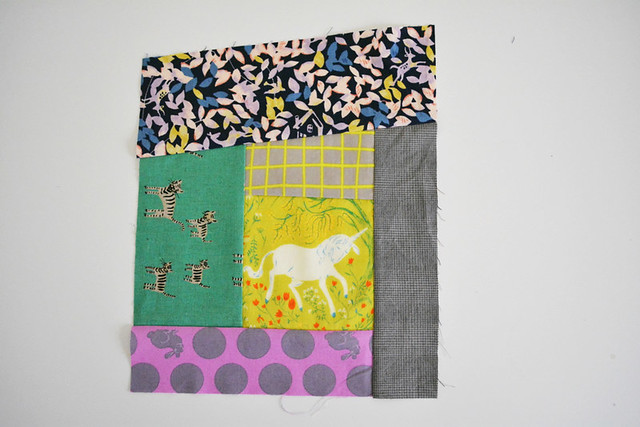
Next edge: same deal. Lay 'er down crooked...

...stitch, press, trim.
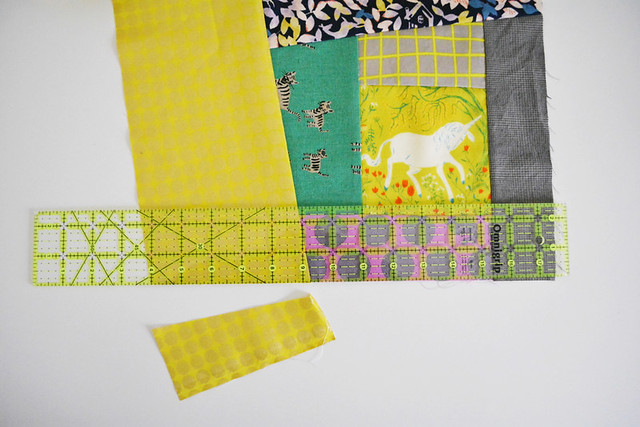
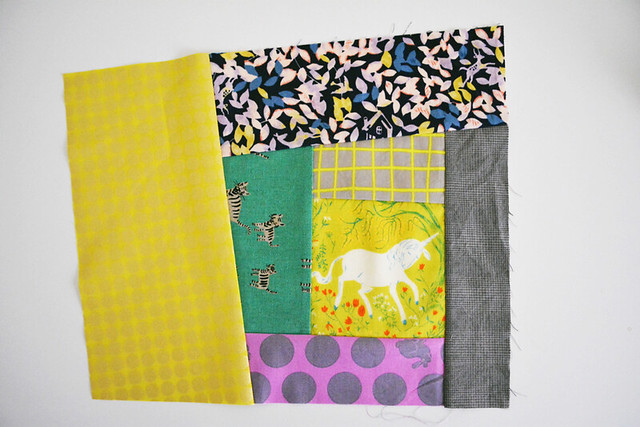
You don't have to make every strip crooked. It's your quilt and you do what you damn well please. [For instance, I find that laying a 2.5" strip down crooked on top of another 2.5" just makes them both too narrow for my liking.]
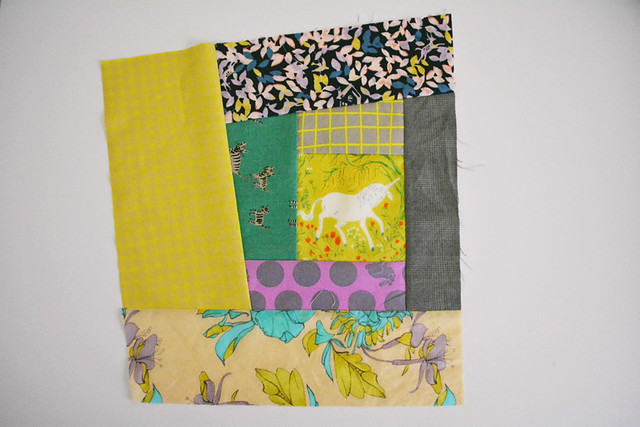
Keep going until your block is big enough to cover a 14" square. I check this by just laying it on top of my cutting mat. I try to keep the center square straight when checking because I like having them straight on the finished quilt. Depending on the combo of widths you choose, you might be done after the second pass, or you might need to keep going a little more. If your block is tall enough but not wide enough, or vice versa, feel free to attach a strip out of order to add the length or width where it's needed.
Also near the end, keep in mind how much you need to add versus which width strip you choose. For example, if your block is only 1" shy of being 14" wide, it would be silly to use one of your 5.5" strips for that edge, because you're just going to end up trimming most of it off anyway. Use a narrower one.
Ok, time to trim. Lay your block over the corner of your cutting mat, with all the edges slightly extending beyond a 14" square grid. Trim the first edge at 14".
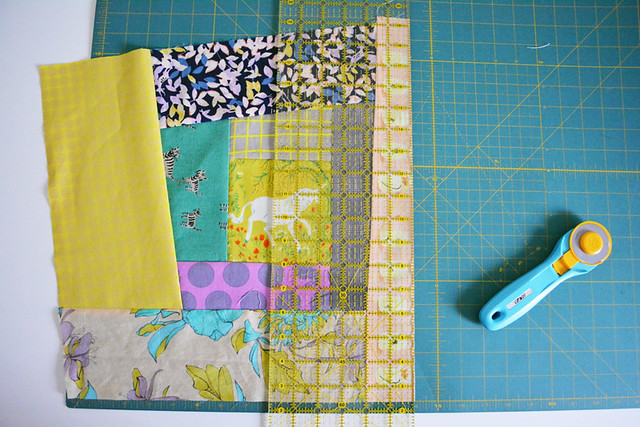
Flip the block 180 degrees, place the trimmed edge at 0, and trim the opposite edge at 14".

Turn it 90 degrees and trim the other two edges the same way.
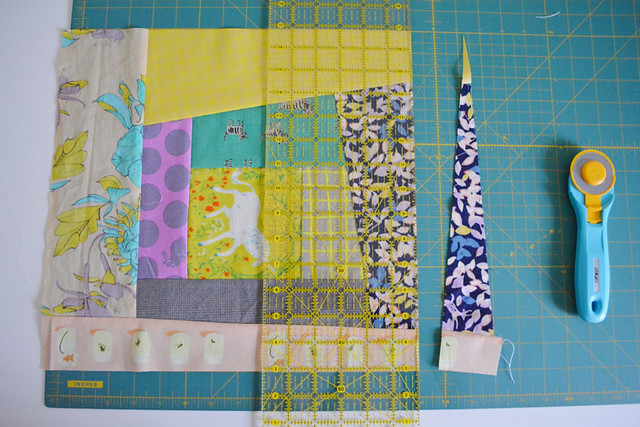
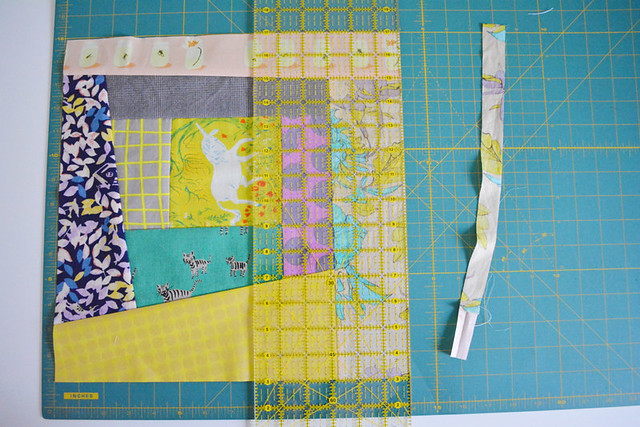
If you totally bomb the trimming, don't worry - just hack off the embarrassing part, go back to your pile of strips, attach some more and retrim. This is seriously the lowest stress quilt ever!
Once it's 14" square, your block is finished!
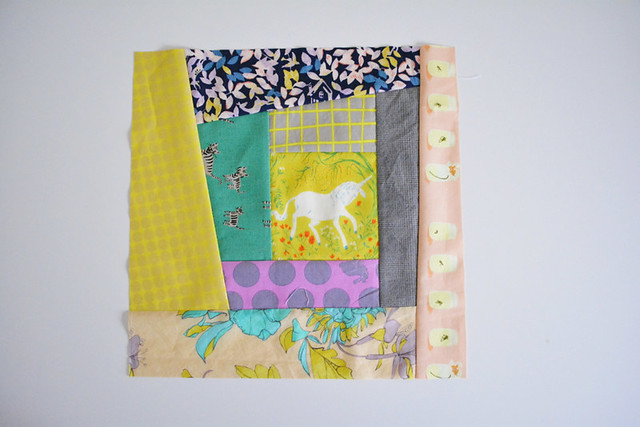
The quilt I made has twelve total blocks. I like to do them assembly line style. It goes much faster, and it also helps prevent accidentally using one type of fabric too often in the same place on the blocks because as you piece each one, it takes that strip out of commission for the rest. So, attach all the first strips at once, press them all, trim them all, return everything to the pile, attach all the second strips at once, etc. It goes pretty fast.
Once you're done, lay them all out and try different arrangements. I usually try to make sure all the fabrics are more or less equally distributed around the quilt. To assist in this task, I employ the highly technical act of squinting at the layout, which actually does help you see if there are a lot of dark or light fabrics clustered together. One of my favorite things about this block is that once you put them together, the fabric starts to make new shapes in some places [for example, the teal tigers in the lower right].
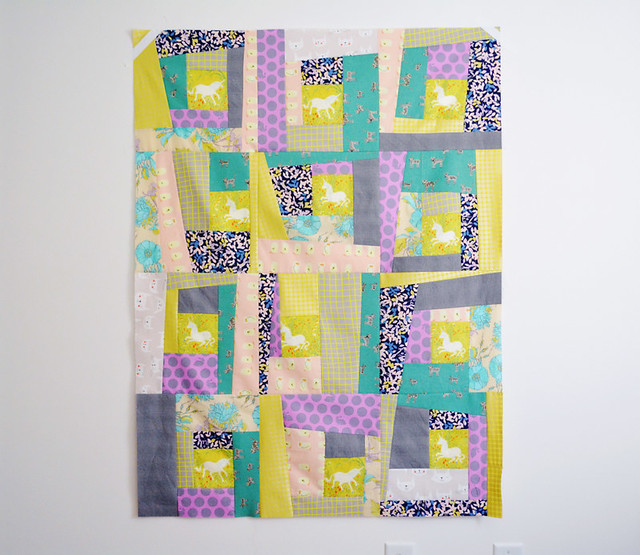
Once you're pleased with the layout, join the blocks in rows with a 1/4" SA, then join the rows. I highly recommend taking a picture of the layout with your phone in case you get interrupted, or you just forget during the walk to the machine which block goes where [a completely valid scenario].
Quilt and finish as desired. There are tutorials a'plenty for that strewn all across the internet.
Let me know if you have any questions!


