Showing posts with label sewing. Show all posts

Wednesday, July 27, 2016

Rifle Paper Boylston Bra

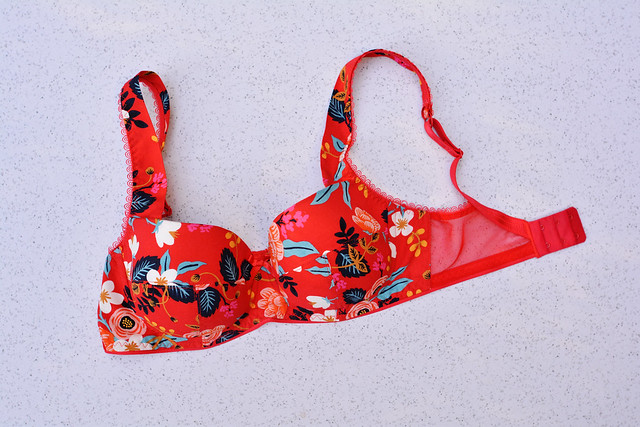
Rifle Paper Bra

Does anyone else "assign" yourself a project, and then over the next several weeks repeatedly think about how you haven't done said project yet, and stress out about it hanging over your head, even though you're the only one that knows about the project and no one will care if you never make it? No? Just me?

After making a dress out of this BEAUTIFUL rayon, I decided that I needed to make a bra from the scraps. They sat in a pile for a few months, guilt-tripping me with their presence, taunting me with their silky smooth delightfulness. Then I had a sewing weekend with some lovely ladies, and I conquered that pile of scraps.

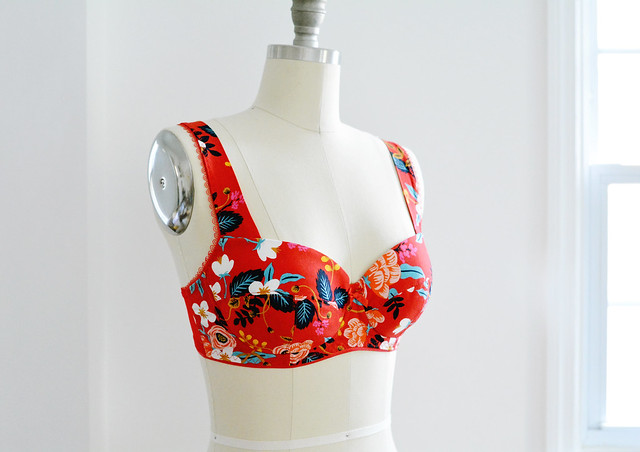
I made a Boylston Bra, pattern by Orange Lingerie.

Rifle Paper Bra

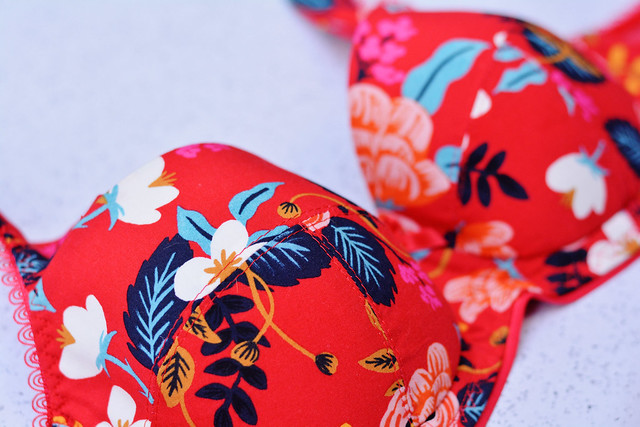
First let me talk about the fabric. This is about-to-be-released fabric from Cotton+Steel [my employer], designed by Anna Bond of Rifle Paper Company. This is her first fabric collection and it is so divine!

Rifle Paper Bra

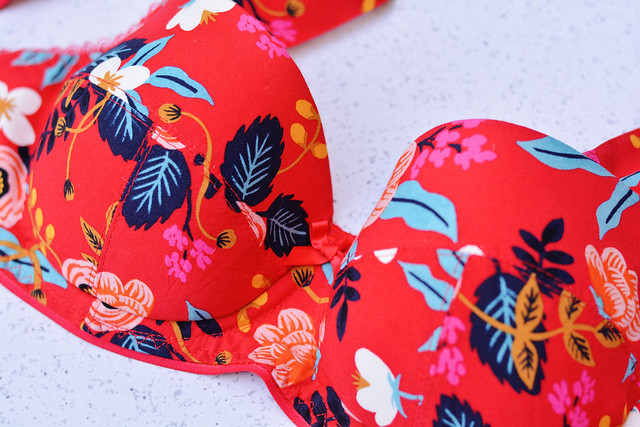
The rayon forms the outer cups, frame, bridge and straps. I love the wider fabric straps, especially how they don't look very bra-strap-ish when they poke out from under something.

[Side note: remember how bra strap headbands were a thing??]

All of the findings/notions/other fabrics were from a red bra kit from, terribly, I can't remember. I think it might have been from Arte Crafts? The foam is from somewhere else that I also can't remember. It was literally the first thing I bought when I was interested in making bras [for some reason]. Aren't I the most helpful sewing blogger??

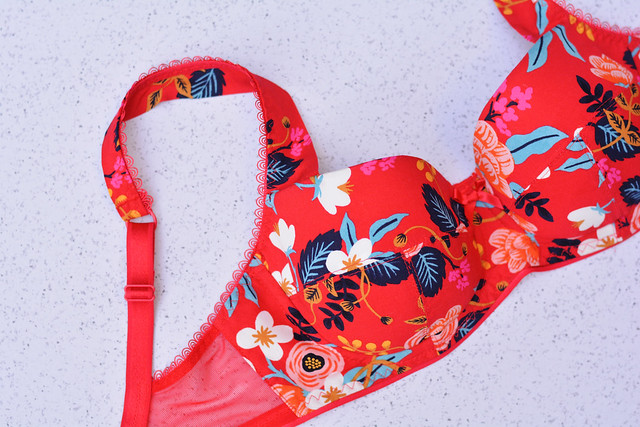
I love the picot elastic that was in the red kit!

Rifle Paper Bra

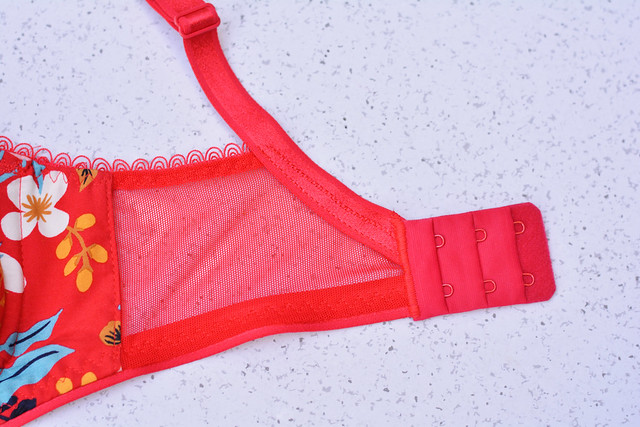
I attached the closure on the back with a medium satin stitch. I remember noticing this on a RTW bra and tried to mimic the same look.

Rifle Paper Bra

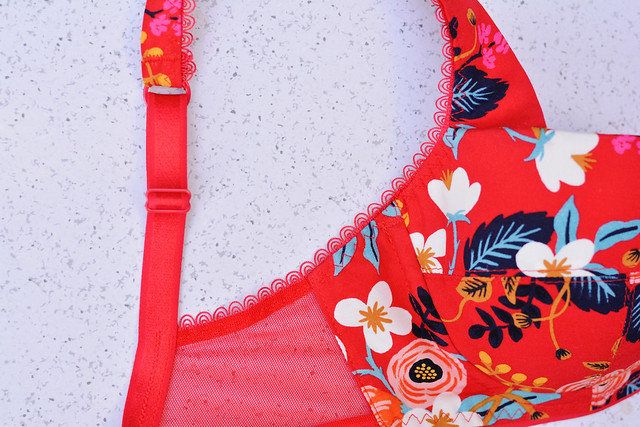
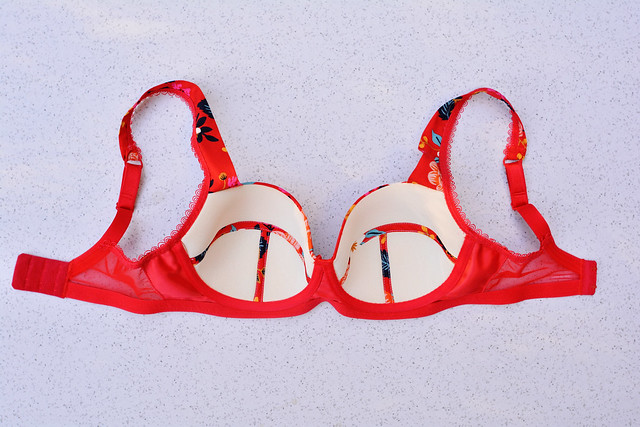
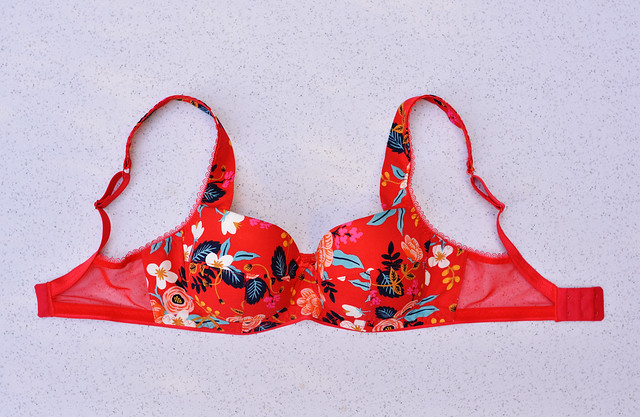
Here is the inside.

Rifle Paper Bra

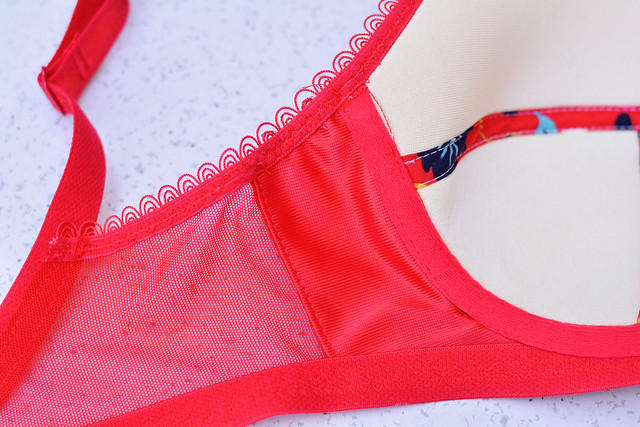
I lined the frame and bridge with the red duoplex that was in the kit. I wanted a really clean finish on the inside and also was worried that a single layer of rayon would be too delicate. I was a teeny bit concerned it would end up too thick but it's totally fine.

Rifle Paper Bra

The lining made it easy to get a completely sealed-in seam on the sides. I just sewed together the lining and shell bridges/frames, then pinned them right sides together along the sides with the powermesh band sandwiched in between. I sewed, turned right side out, topstitched, and then basted the raw edges of the the frames together.

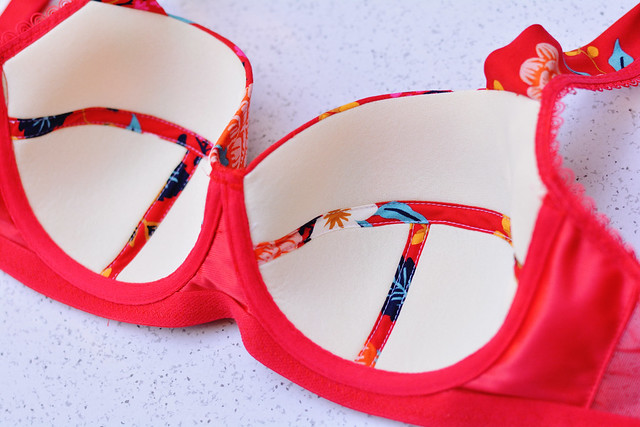
This is my first time making a Boylston Bra, and the first time doing a foam bra. The pattern doesn't include any info about making a foam lining, but luckily there's an awesome tutorial series about it on Cloth Habit, so I used that for reference. I did it about 95% right - the foam is a little too bulky right where the strap connects, which I think is because I didn't trim it down far enough.

Rifle Paper Bra

I used a 3 step zig zag to seam the foam cup pieces together, then used bias cut strips of the rayon to cover the seams, which I love.

As for size: I have already made several [yet un-blogged] Marlborough Bras, also by Orange Lingerie. When initially making the Marlborough I went through a little fitting process and ended up making a 34C and removing 1" total from the back band. This was actually a larger size than I should have made based on my measurements, but it worked out. So I went ahead and cut that size in the Boylston, figuring the fit would be fairly similar.

It fits pretty well, a little bit on the restrictive side but totally wearable. In an effort to use up the extra strap elastic, I used it for the bottom band, only realizing after that it's way less stretchy than the band elastic. So that's part of it. I also probably shouldn't have preemptively shortened the back band. I think that next time I will make a 34D and use the proper elastic, and that might be a little bit more comfortable.

Here it is on my headless lady friend.

Rifle Paper Bra

This bra is really awesome on. It looks super fancy and, not gonna lie, makes the girls look pretty great.

Rifle Paper Bra

Overall I LOVE the Boylston Bra pattern. I can't wait to make more and continue tweaking. I'm also definitely going to make it into a bathing suit at some point. See how many projects I'm assigning myself? Up over my head they go.

Rifle Paper Bra


Monday, March 21, 2016

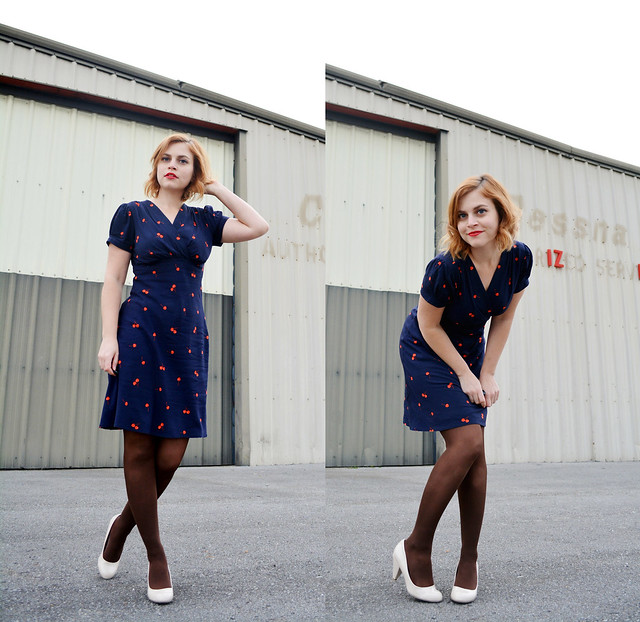
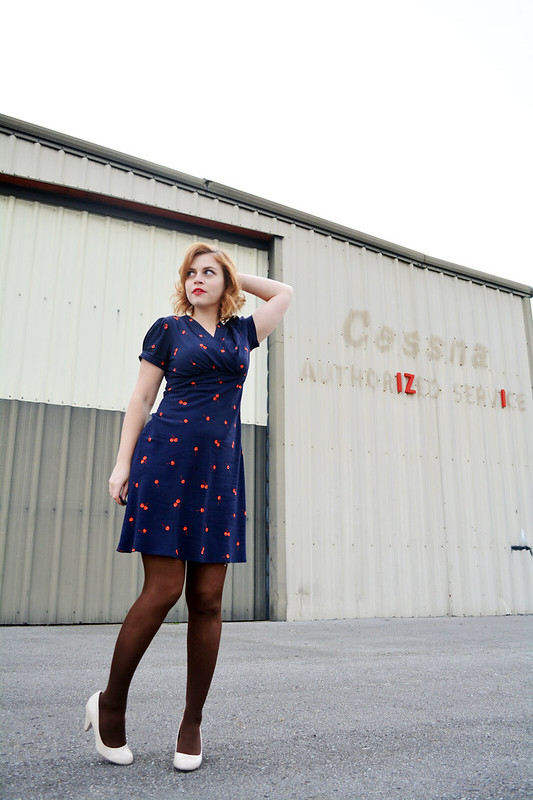
McCall's 7116 / Cotton + Steel Fruit Dots Rayon

McCall's 7116

Should I even talk about how long it's been since I've posted?

Nah.

(Except yeah, it's been a really long time. Is anyone still reading this? Do people still read blogs? What should I have for lunch? If you can answer any of these things, comment below.)

M7116 / Cotton + Steel Rayon

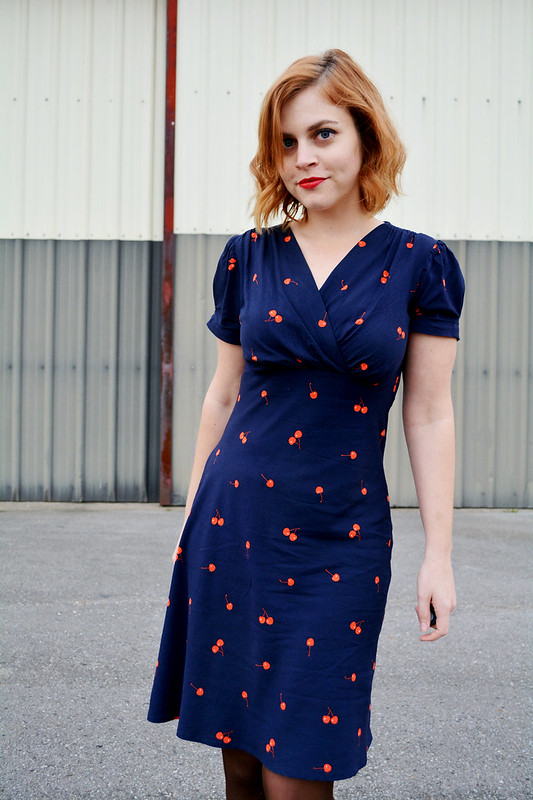
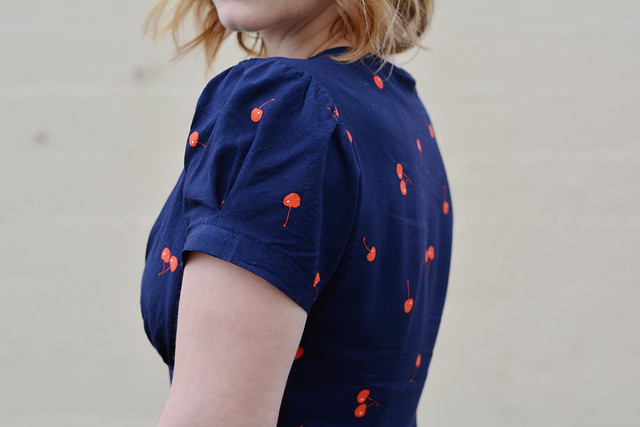
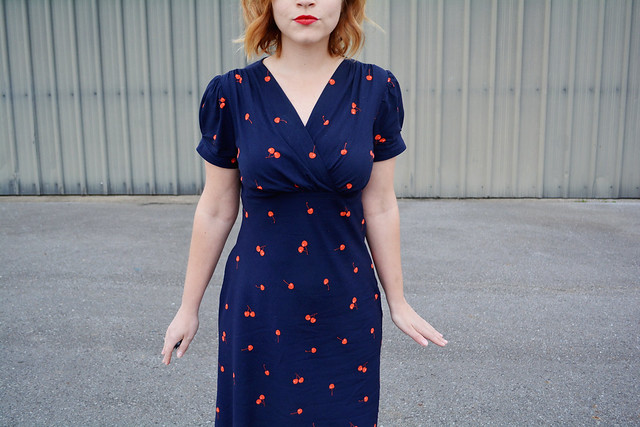
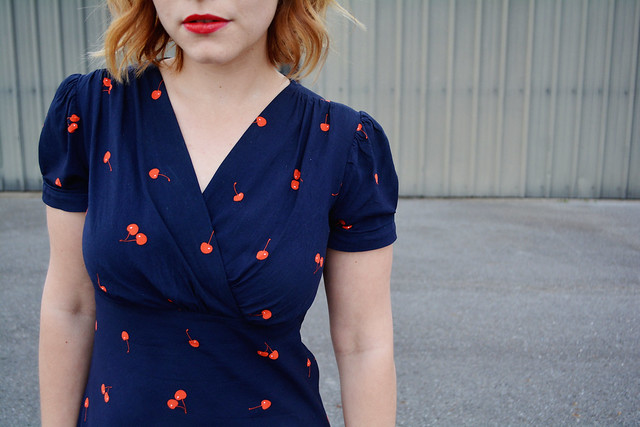
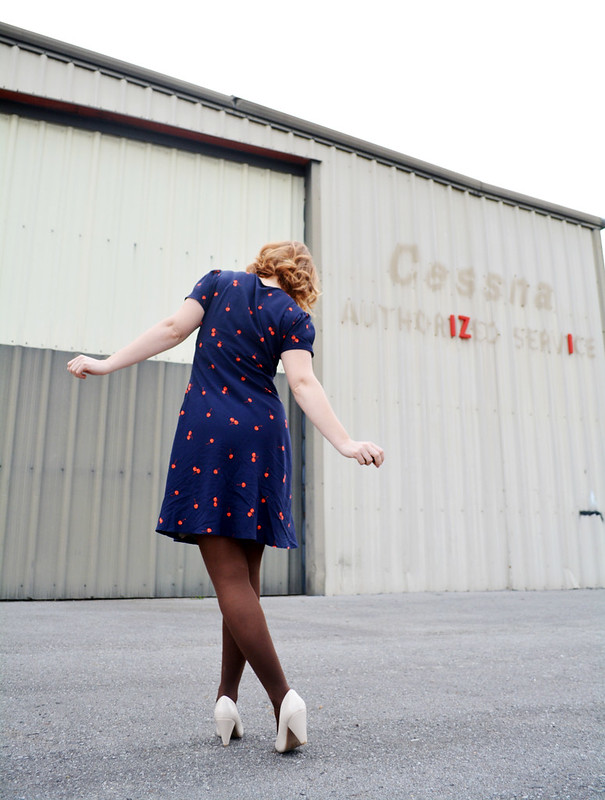
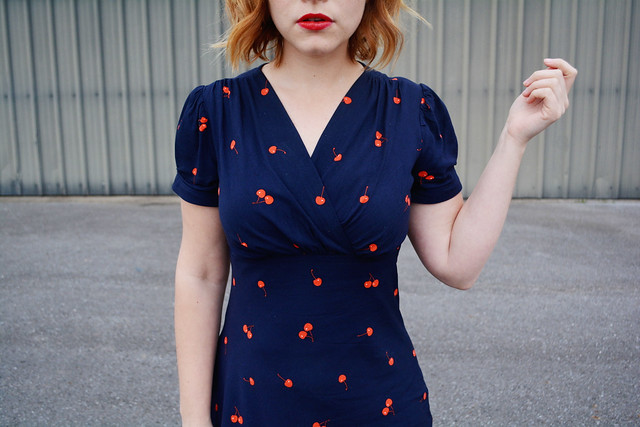
This dress is McCall's 7116 made out Cotton + Steel Fruit Dots rayon. It has an overlapped, self-faced, gathered bodice, side zip, and bias-cut skirt. These pictures were taken after wearing it two days in a row. Let it be known that this was only because I was doing a video at work and had to have the same wardrobe, and no, I don't want no scrub. But I love this dress enough to really not have minded that much.

So here are the details:

FABRIC: Cotton + Steel Fruit Dots Rayon (Melody Miller)

McCall's 7116

I've already spent time lauding the glorious qualities of C+S rayon. If you've never sewn rayon before and want to know a good place to start, start here. C+S rayon is a teensy bit heftier and *firmer?*beefier?* than any other rayon I've worked with. It just seems to know where to fold itself, and has such a nice, non-clingy drape. It's assertive fabric. It's decisive fabric. It's fabric that knows what it wants.

The cherries also come in a deep turquoise/mustard colorway, which is equally as lovely. Luckily, the place where I was in-person-shopping only had this colorway. Phew. Dilemma avoided.

I prewashed cold and line dried. My other handmade rayon garments have not stood up well to machine drying, which I know is a rayon no-no, so I'm finally trying to be a grownup about it and actually line drying some things that need it.

PATTERN: McCall's 7116

McCall's 7116

I bought this pattern impulsively after seeing it posted on the McCall's instagram. Suggestion to purchase, obeyed.

As with any Big 4 patterns, I erred mostly on the side of smaller than what it says. My measurements are 33-27-38 and I cut a 10-12-16. The 16 was actually a size up from what I should have cut, but I'm glad I did since I would not have wanted it any smaller.

McCall's 7116

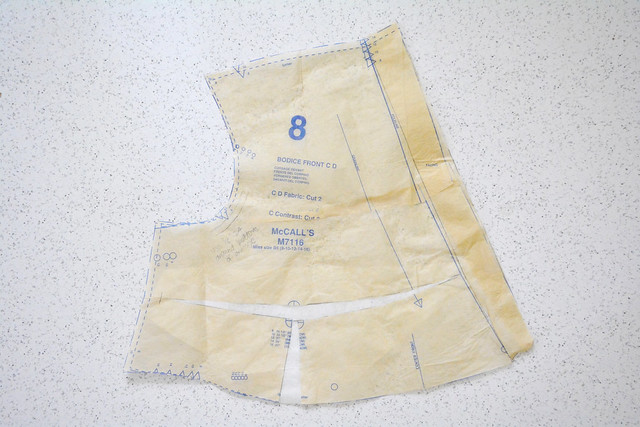
After muslining just the bodice, the front neckline edges had some serious gaping action, so I took a wedge out there by slashing across the bodice to the armscye, overlapping, and redrawing the front edge to straighten it out.

I also thought I might need to take some kind of FBA action (I'm always on the edge of needing one), as the bottom edge of the pattern piece seemed too short just under by bust. I was feeling a little adventurous so I just kind of winged the adjustment, and I think it totally worked! I slashed horizontally though the bust point, then up to it and hinged, and just lowered the two hinges by the amount of length I wanted to add. This also added some extra fullness to the gathers.

Also, the sleeve was too tight. I was about to get all complicated with the slashing and the spreading, when I realized I could just make the pleat smaller and add circumference that way. So much easier! So I added 3/4" to the sleeve, which basically just meant redrawing each pleat line 3/8" in towards the center.

THE SEWING

M7116 / Cotton + Steel Rayon

I squeezed this out of about 1 7/8 yards of 45" fabric, with not an inch of extra to spare. This was an amazing and stressful feat accomplished by intense pattern piece tetris-ing and much uncomfortable kneeling on floor. I had to cut everything in a single layer to get it to fit.

I added interfacing to the self faced edges of the front bodice neckline. I used fusible tricot interfacing and cut it exactly the width of the facing, so that the fabric wants to fold over right where it should.

McCall's 7116

I used to hate doing side zips for some reason, but this one went in really well (it's that fabric I tell ya), and I think it might have converted me! I wish I had a better shot of it. One little trick I always do with invisible zippers is to fuse a 1" strip of tricot interfacing to each side of the seam before putting in the zipper. This reinforces the fabric and makes everything a lot smoother and sturdier. I actually have a roll of 1" wide tricot interfacing from Wawak that is the most amazing shortcut ever, but I just searched their website and they don't seem to have it anymore. Sadness.

After finishing and trying on, I decided the skirt was just a leeeetle too tight across the hips, so I let out the non-zipper side seam as much as I could. I now feel a slight diagonal pull in the skirt when I wear the dress, but I don't think it's visible so I'm just dealing.

M7116 / Cotton + Steel rayon 
me, dealing

Last thing to note is that I omitted the sleeve buttons, which are only decorative anyway, because they just felt like too much with the pleat and the gathers and everything.

I really, REALLY like how this turned out, and I have Anna Maria Horner's Fibs & Fables Helios rayon on standby for the next one. Let's see how long it takes me to blog about THAT.

McCall's 7116

Wednesday, June 3, 2015

An Unnecessary Recap of Me Made May 2015

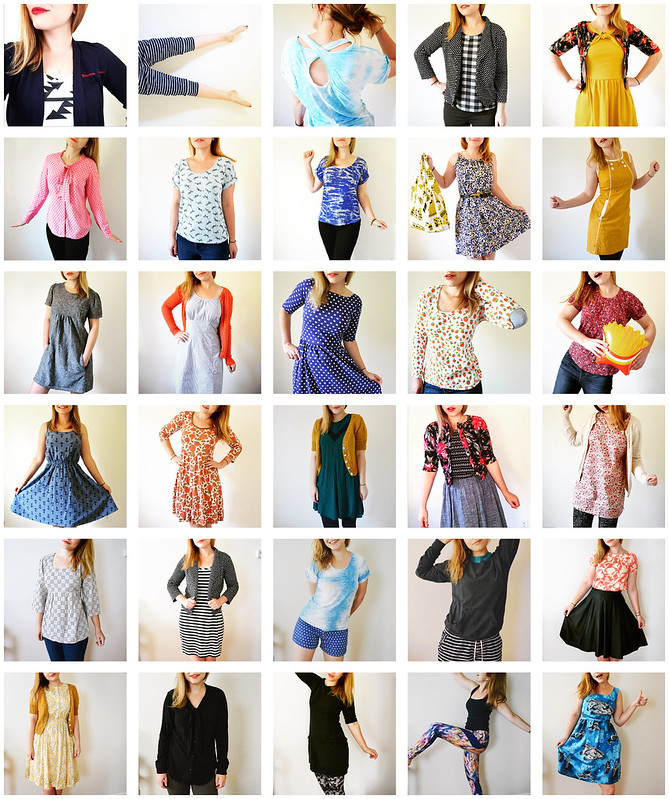
Ok. So if you follow me on Instagram, I've just made you endure pictures of my outfit every single day throughout the month of May. If you're still with me, now I'm showing my gratitude by forcing you to look at all of these outfits AGAIN, ALL AT ONCE.

But you see, I really wanted to make a photo collage.

Me Made May 2015

[I got rid of one picture - a day I was sick and wearing a sweatshirt - so that I could have a rectangle. Symmetry>accuracy.]

In case anyone is interested, here are a few conclusions/random thoughts I had while doing this:

The eyes are the window to the soul, or to the crazy. It was so much easier to take pictures of myself [read: pictures of myself that I could easily accept] if I cropped off the top of my face. I can't tell you how many of these pictures feature crazy / is-she-drunk / is-she-about-to-kill-someone stares. But you never knew. Until now.

I need to make more cardigans and jeans. This is not a very exciting conclusion, but it's a fact. These are the two main categories in my wardrobe that are still RTW, and I wear them a lot.

I'm a terrible blogger. By this I mean that I've only blogged 15 of the 39 things I wore throughout the month. What is the statute of limitations on blogging? Is it weird to blog something I made three years ago?

Social media can be really bad for your brain. This part was actually very real and not so great. My routine would be that I would snap a few pictures on the way out the door in the morning, then post one when I got to work. After that, all day, a steady stream of Instagram notifications meant my phone was constantly glowing, constantly delivering those tiny surges of validation. And honestly, I think I got a little addicted to it. Checking my phone was like a lab rat pushing the dopamine lever. [By the way, there are a ton of articles about how social media appeals chemically to the dopamine receptors in our brains: here is one.]

I don't normally post on a such a regular schedule, and not necessarily every day. So I really think I was conditioning myself to want it. It was much different than just absently checking the feed in a down moment. Eventually I had to put my phone away because it was really interfering with my attention span.

Has anyone else ever experienced this? And if you did Me Made May, did you learn anything? I probably won't do it again, but it was interesting to try.

Thursday, May 21, 2015

I'm teaching at Craft South!

scouttee1

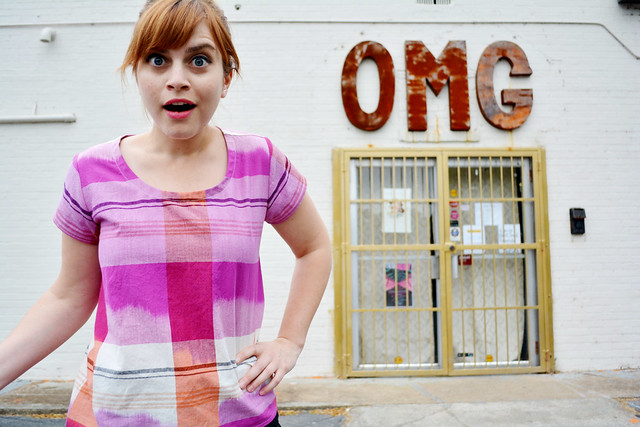
OMG!

The amazingly talented Anna Maria Horner is opening a craft space / craft store in Nashville called Craft South, and I'm going to be teaching there!

scouttee2

It's going to be a big, beautiful space in 12 South with fabric, yarn, embroidery, classes and workshops, and even a handmade goods boutique. And if you're not local, despair not, you can shop their online store! It's already live and filled with good stuff.

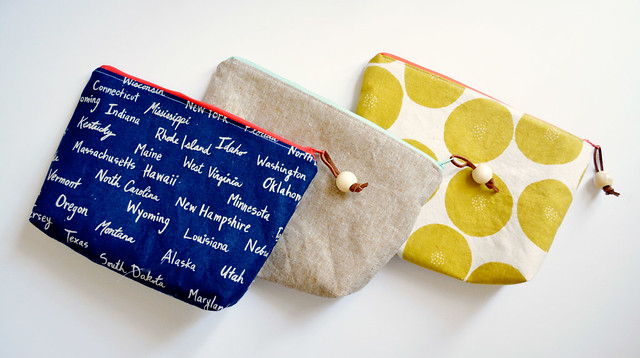
I'll be starting things out by teaching the Million Use Zipper Bag. This is perfect for beginner sewers, or if you've never tried tackling a zipper. It's a one session class (Thursday June 4th) so no major commitment. And these little bags seriously have a million uses! You'll want to make a ton. Or a million. You can sign up online here.

zipbag1

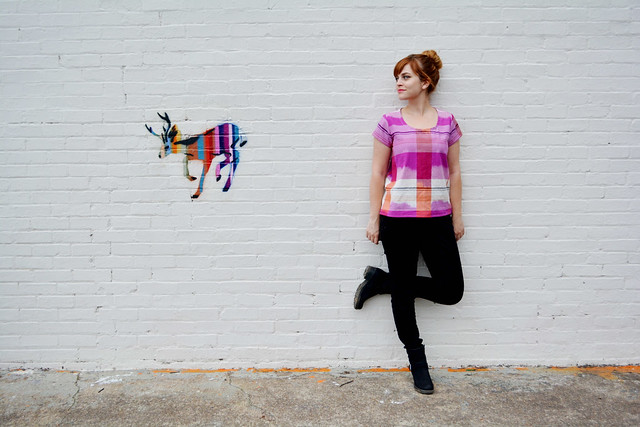
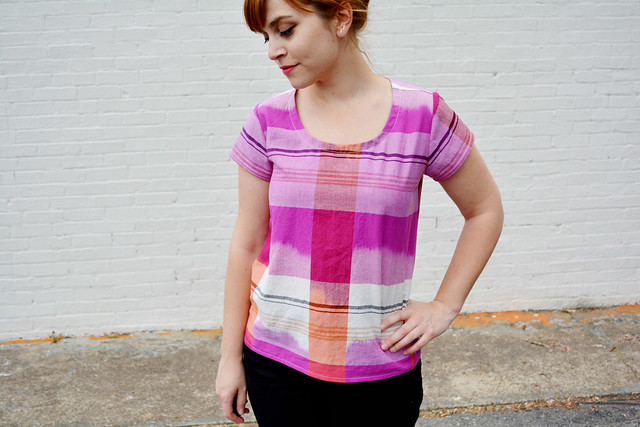
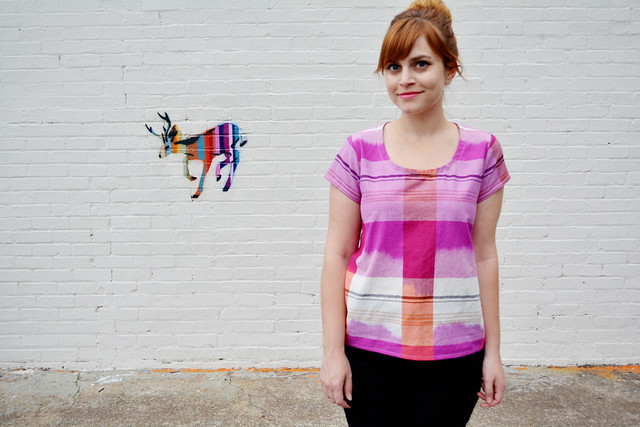
My second class will be the Grainline Studio Scout Tee, which is what I'm wearing in these photos. This is a great first garment to try if you've sewn before, but feel shaky about following a pattern. Over the course of making the project, we'll be learning how to choose a size, cut out the pattern, sew and finish seams, do set-in sleeves, a bias bound neckline, and a double fold hem. Lots of new skills to learn, plus by the end you'll have a cute new shirt!

scouttee4

This is a three session class that meets three Thursdays in a row starting June 11th. You can sign up online here.

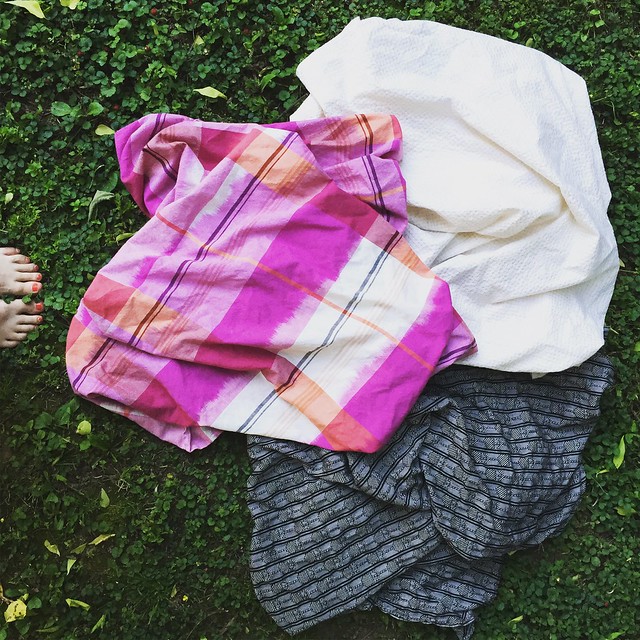
The class sample is made from one of Anna Maria's gorgeous new Loominous fabrics, a collection of yard dyed wovens. They are all spectacular. Want. Them. All.

Anna Maria Horner Loominous Fabric

Craft South's grand opening is going to be Friday May 29th from 4-8pm. I'll be there, so I hope you will too!

P.S. The awesome signage and painted deer are outside Old Made Good, a vintage store in my neighborhood. You should probably follow them on Instagram.

scouttee3

Monday, April 13, 2015

Closet Case Files Ginger Jeans

gingerjeans_black25

Ways to Test Your Self Confidence:
1. Take photos of yourself to post on the internet
2. Choose a location near a busy four way stop
3. Frequently stand very close to the camera with the lens pointed directly at your butt
3. Wear a shirt you have to constantly lift out of the way
4. Make sure it's the weekend
5. And also the time of day when everyone walks their dogs

gingerjeans_black06

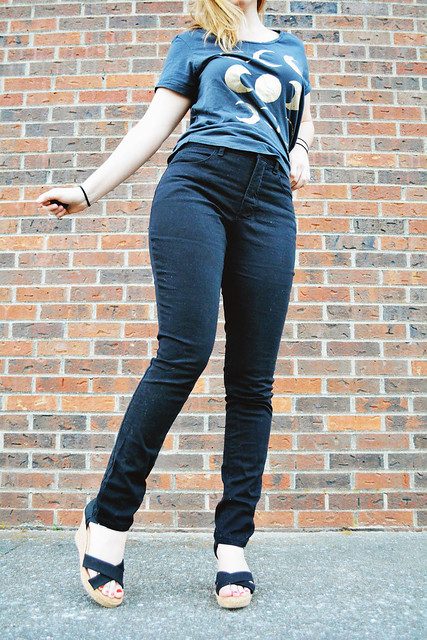
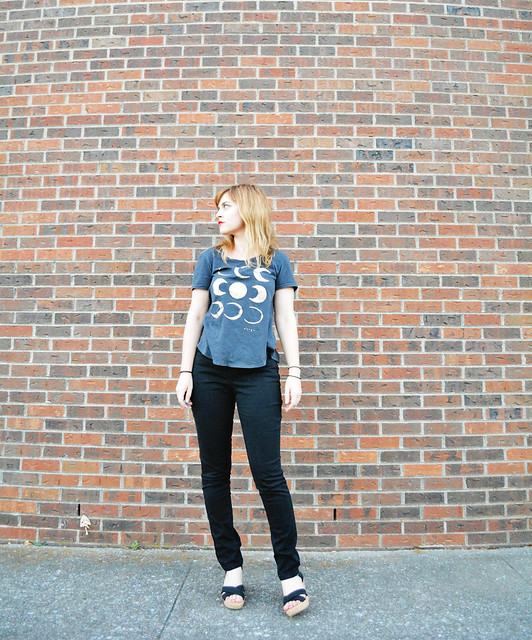
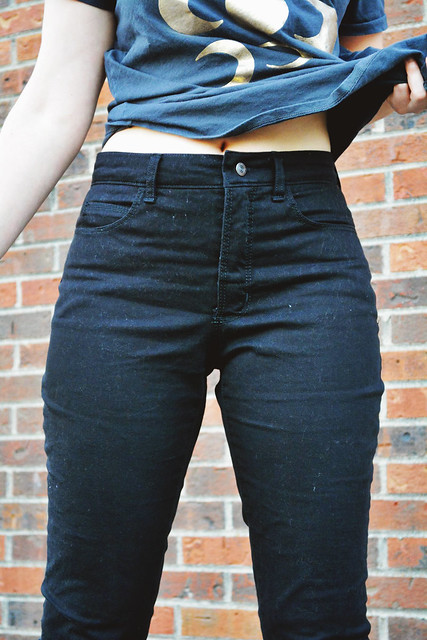
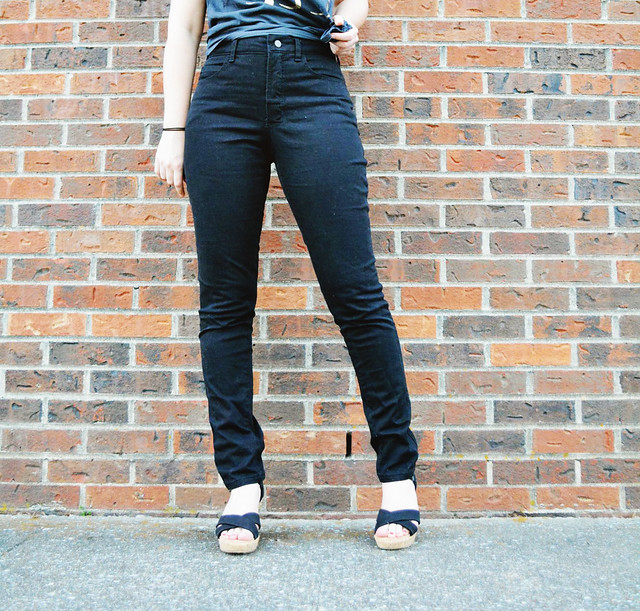
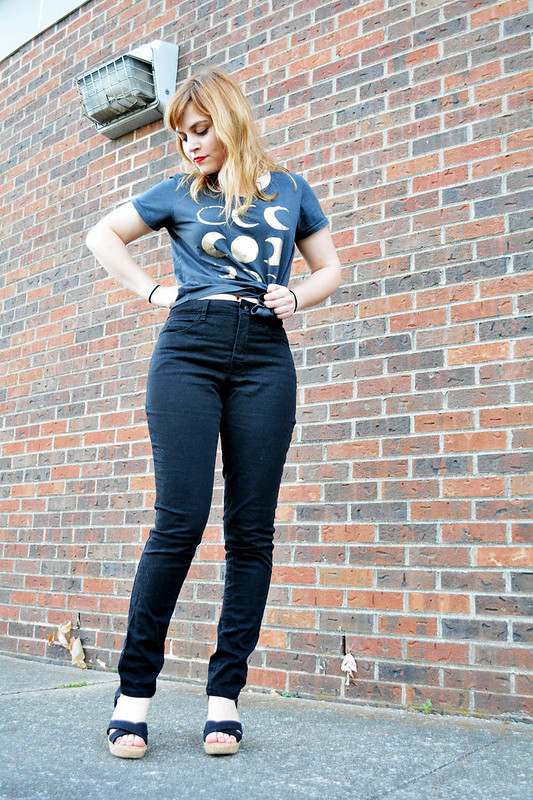
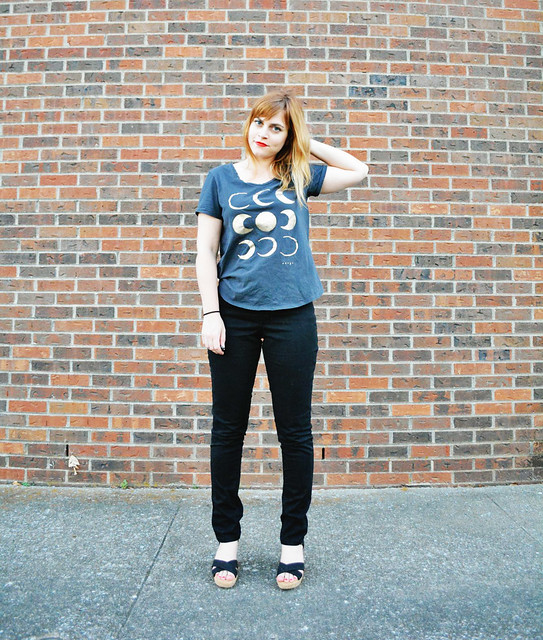
I finally forced myself to take pictures of the Ginger Jeans I made a few weeks ago. These are the high-waisted View B version.

I have a severe shortage of non-denim pants in my wardrobe and I've been experiencing some Ginger Jeans envy for a while now, so it was only a matter of time. I can't wear blue denim jeans to work, although non-blue jeans seem to be ok, so these pants are the first installment in my future abundance of work pants.

Short version:

I LOVE this pattern. I promptly bought four more fabrics to make four more pairs. I shall have a pants rainbow! I made barely any changes, I'm totally happy with the fit, and they were not intimidating at all to put together. There are a few tweaks to make on the next pair, but overall, I'm pretty psyched.

gingerjeans_black12

Long version:

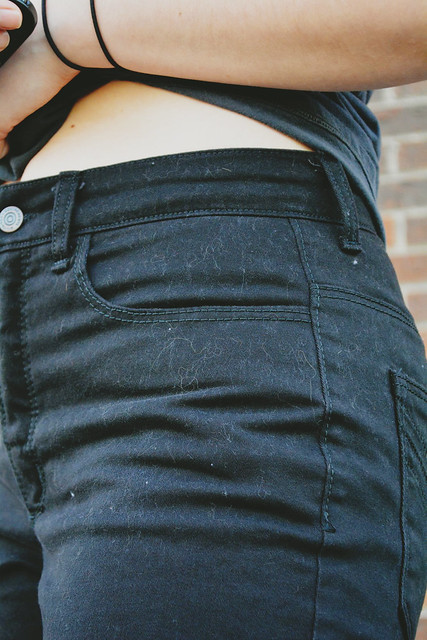
The first f word - FABRIC. This fabric is a black stretch twill from a local store called Textile Fabrics. I liked it at first, but I like it less and less as I wear them more and more. They stretch out a lot when I wear them, so I can really only wear them once before washing. Also, EVERY SINGLE PIECE OF FUZZ IN EXISTANCE is stuck to them, constantly. You can see it in some of the closeups, which were taken after going through SIX lint roller sheets. It drives me crazy. And it's not even cat hair, it's just the general fuzz of life. So that will probably limit my wearing these too.

gingerjeans_black23

The second f word - FIT. I did not want to make a muslin for these, since it would have been a lot of work and I would have had to use a stretch fabric anyway. So I decided to just go for it, hope they would mostly turn out, and then make any minor fit adjustments after they were together.

Before cutting, I did a few things. My measurements were putting me at a 6 in the waist and a 10 in the hips. Since there are so many pieces involved in this area, I cut out the paper at whichever size line was on the outside (usually 10, but sometimes 6), then laid them all on top of each other like they would be sewn. Then I used a curved ruler to go from the 10 at the widest point to the 6 at the top of the pocket facing, and cut along the line through all layers. I did the same thing with the back and yoke. The waistband I just cut a 6.

[Once I basted them together - I sewed the whole fly first so that part would fit as it would when finished - the hips were too big, so I took them in probably to a size 8.]

gingerjeans_black20

The other thing I did was preemptively straighten the front crotch curve below the fly. Based on all the other pants I've attempted, this seams to be one of the things I need to do. This adjustment had mixed results, and I probably should have just left it as is for the first go.

gingerjeans_black11

You will see in the above photo that I had a major fail moment when I did the buttonhole, as I put it way too far over to the left. This makes the whole front look off center. But if you look at the center front seam [the edge of the fly], it's right in line with my belly button, so just the button placement is off. It was late and I should have gone to bed, but no, I had to make that buttonhole, and totally bombed it.

So let's talk more about crotches, shall we? [welcome, weird google search creepers.] I am going to describe to you to my Crotch Conundrum when it comes to pants fitting. Lucky you! So I mentioned that I straightened the front crotch a little, which I probably didn't need to do, because you can see there is extra fabric bunching up at the top of the front legs. So I will scoop the front crotch seam back out to take care of that. (Lauren of Lladybird has a really good post about this J-crotch adjustment.)

HOWEVER. You will also see that there are horizontal wrinkles below/across the fly. This seems to say there there is too much fabric in the front crotch curve. So I would pinch it out and then remove a wedge from the pattern. This shortens the front crotch curve. BUT, when I also do the previous adjustment (making the curve more J-shaped) this lengthens the same front crotch curve. These adjustments don't seem like they should go together! Don't they just cancel each other out? And when I shorten the front crotch curve, should I take it out of the fly, or the section below the fly? Does anyone have any insight on this?

If you are still reading, bless your heart. Here's the back.

gingerjeans_black07

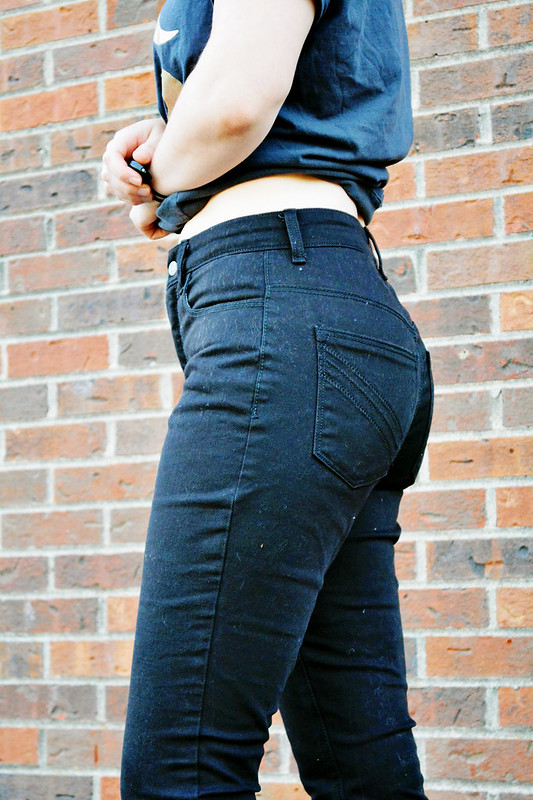
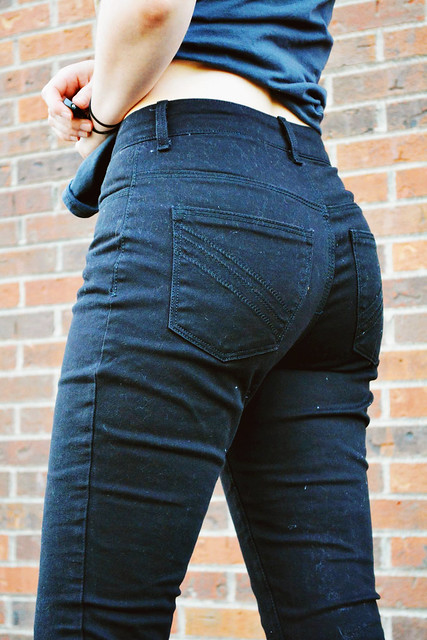
The Ginger Jeans are very kind to your booty. Not gonna lie, my backside feels pretty great in these pants.

The back pocket placement is SO IMPORTANT (as Heather mentions in both the instructions and the sewalong), so definitely baste them on first. Did I do that? Of course not! Ignoring the warnings, I topstitched both of those suckers down all the way, only to try them on and realize they were way to low, making me look like I was wearing a dirty diaper. Quite attractive! So I seam ripped through my precious topstitching thread and moved them up 3/4". It was a night and day difference.

Also, I prefer bigger back pockets on jeans [negative space on butt = bad] so I used the size 12 pockets.

Can we just talk about the back pocket embellishment potential here? I originally wanted to embroider an anchor like Sarah, black-on-black, but I was running short on time and didn't want to rush so I just did three rows of decorative stitches in black rayon thread. But ever since then, I can't stop checking out people's jeans pockets, aka staring at stranger's butts. You could do so many different things to those pockets!

gingerjeans_black04

On the inside, I did the front pocket stays as detailed in the sewalong, because heck yes built-in spanx. Really though, I love how stable and flat the front is. I used some of Rashida Coleman-Hale's pretty cranes, partially because they were still out from the last project, but mostly because they are pretty! Next time, I think I'll leave them right sides together instead of turning them, because the bottom seam is a little bulky. Also, that way when you look into the pocket from the outside, you'll see the right side of the fabric instead of the wrong side.

gingerjeans_black27

I also opted to use the quilt weight for the waistband lining, which I wasn't sure about but really like. It keeps the waistband from stretching out too much but also prevents it from being too bulky. I didn't use any interfacing.

gingerjeans_black01

Sewing these was actually pretty easy, considering you are making f'ing jeans. It's not fast, and you have to keep switching back and forth between topstitching and regular thread, but it's not too difficult, especially with the sewalong as a reference. One thing I did differently - when you attach the zipper to the first side of the fly, instead of putting the teeth just to the side of the center front, I aligned the edge of the zipper tape with the edge of the extension. This sets the zipper in deeper. (And Heather mentions this as an option in the fly post of the sewalong). I wanted to make sure my zipper wasn't going to peek out.

In doing some topstitching tests, way too much topstitch thread was showing on the back, so I found that turning up the tension pretty high when topstitching - like to 7 - made it look a lot better. Also, I held the thread very taut when threading through the tension discs to make sure it really got in there. Then I ran out of topstitching thread about two thirds of the way through, so I just switched to a triple straight stitch for all the topstitching [like the waistband/belt loops in the photo] and it worked out ok.

gingerjeans_black14

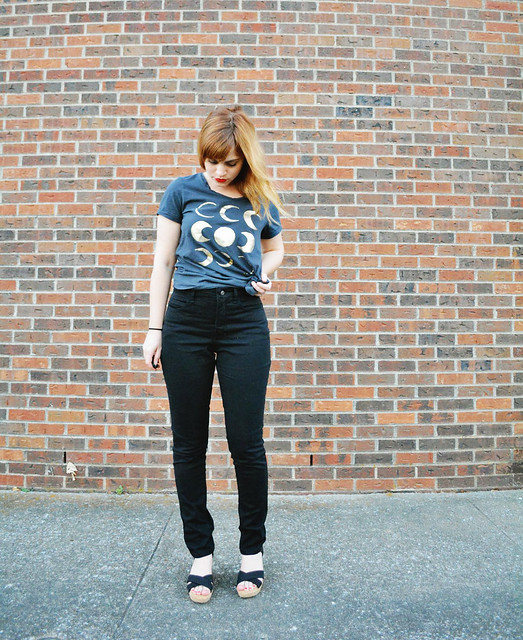
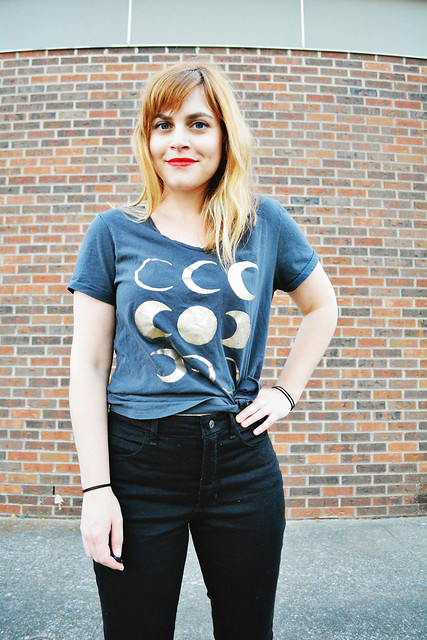
Also I want to give a little shout out to Pony Show, a really cute shop in my neighborhood where I bought this shirt. I'm pretty into anything with moon phases on it, and the owner screen prints them herself, so when I saw it it was a done deal. [She sells them on Etsy too.]

Closet Case Files Ginger Jeans

And now I shall commence on my Rainbow of Pants.

gingerjeans_black21

Wednesday, March 11, 2015

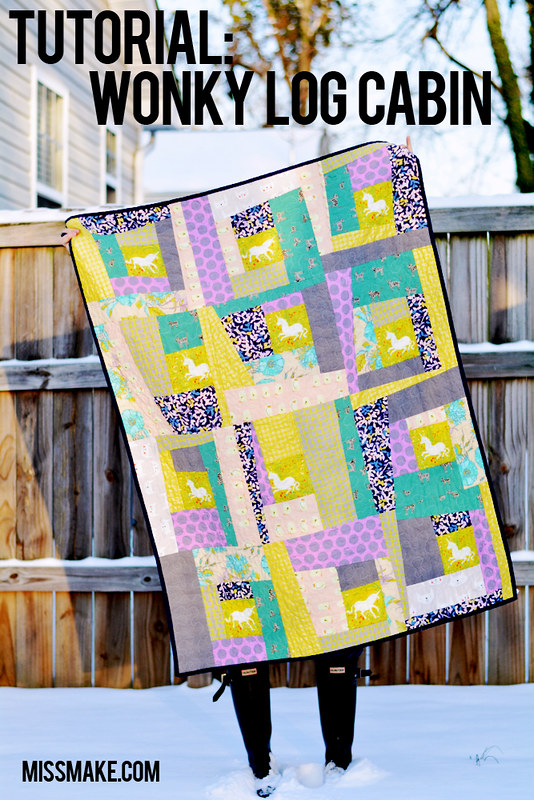
Tutorial: Wonky Log Cabin Quilt

Tutorial: Wonky Log Cabin Block

I haven't made a quilt in a really long time. I missed it! It's so much different than making clothes. The way I usually go at it, it's not unlike a grown up version of cutting up construction paper and gluing it to something [to be honest that sounds fun to me too] except that you're using pretty fabric.

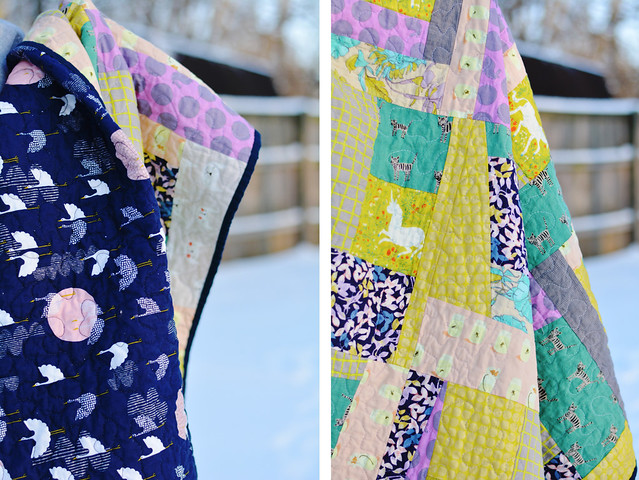
A childhood friend is having her second baby in April and she requested a quilt. This is the result, and it's currently on its way to Belgium [her husband is in the army] in anticipation of baby girl's appearance in April.

Tutorial: Wonky Log Cabin Block

She wasn't set on any particular pattern, so I decided to do my trusty wonky log cabin block. Nothin' like some trusty wonk. It's the same pattern I used for her first baby's quilt [blogged here] and also a class I taught a couple times at Sew LA. And I'm also now remembering I made one for my brother that I never blogged. Like I said, trusty.

This is the color scheme she sent me:

Tutorial: Wonky Log Cabin Quilt

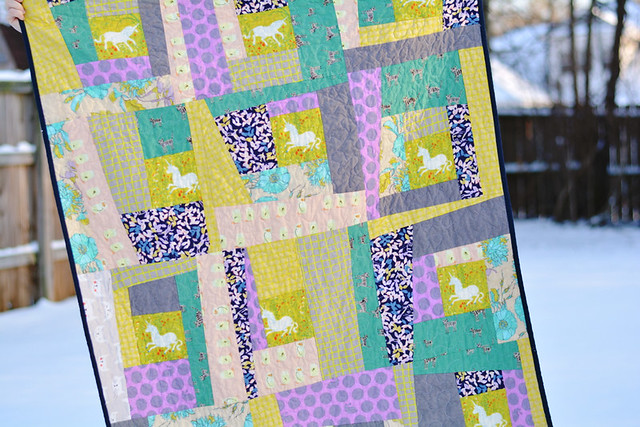
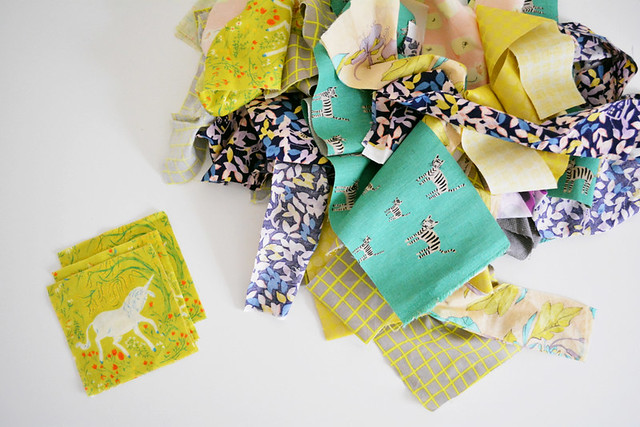
I pulled most of these fabrics from my stash, with a few supplemental purchases from The Fabric Studio. The center for each block is a Heather Ross double gauze unicorn. This is fabric I have been hoarding since its first release in 2008-9[?]. Surprisingly, I did not have to rip it violently from my own rabid grasp, I was actually really happy to be able to use it on a special project like this. I also used some of my Heather Ross tadpoles-in-jars fabric, from the same era and hoarded with equal fervor.

Tutorial: Wonky Log Cabin Block

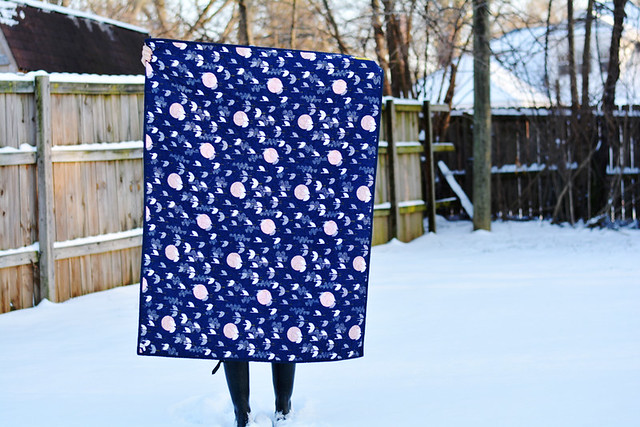
There are a couple Cotton + Steel gems in there, because their fabric is woven from secrets and magic and goes with everything. For the back I used Rashida Coleman-Hale's navy crane fabric she designed for Cloud 9. So pretty!

Tutorial: Wonky Log Cabin Block

If you're a garment sewer and you're thinking about making a quilt, maybe try this one! It's really so fun and easy, and you barely have to do any initial cutting. All the crazy shapes are just made by attaching some strips crooked on purpose. I thought I'd write up a tutorial in case anyone is interested; I'm sure there are many already out there, but here's another! And it includes fabric yardages for making this size quilt, which is a generous crib size or a small throw/lap quilt.

Tutorial: Wonky Log Cabin Block

MATERIALS

To make a quilt of this size [about 40x54"], you'll need:
  • 3/8 yard of eight different fabrics [this is the bare minimum, for extra fabric safety you can get 3/4 of one or two]
  • twelve 5" squares for the centers [to fussy cut, cut a 5" square in a piece of paper and use that as a stencil to mark your fabric]
  • 1 5/8 yard for the back
  • batting
  • 3/8 yard for the binding [if you do 2.5" wide cross grain binding]


CUTTING

From each of the eight fabrics, cut one selvage-to-selvage strip in each of the following widths: 2.5", 4", 5.5". Fluff them into a big pile [optional].

Tutorial: Wonky Log Cabin Block

ASSEMBLY

A log cabin block is a center square to which strips of increasing length are attached, in clockwise or counter clockwise direction, until the block is the desired size.

For the first pass around the center square, we're going to be straight with our piecing and save our wonk for later. I felt that after taking the time to fussy cut the centers, I didn't want them to end up a weird size and/or accidentally amputate unicorn limbs.

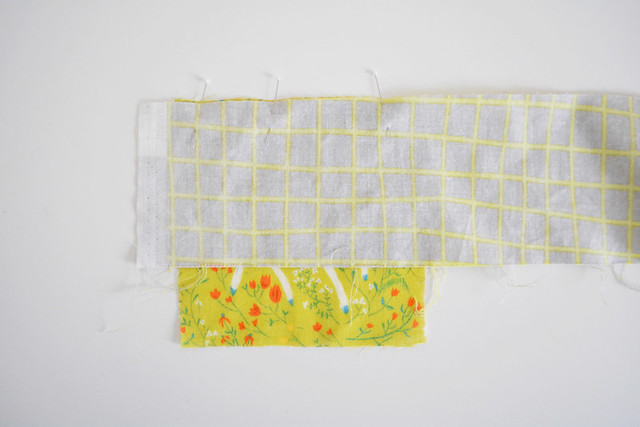
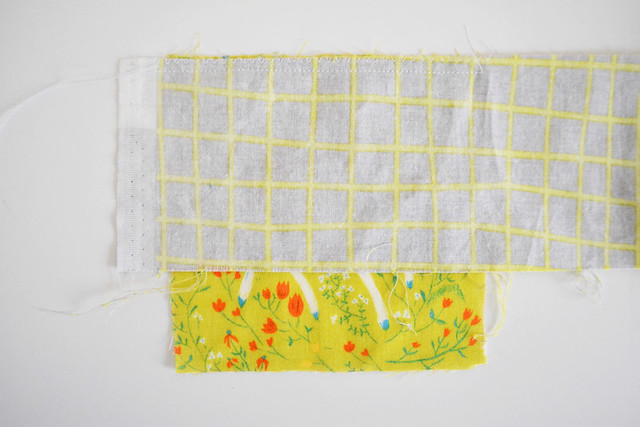
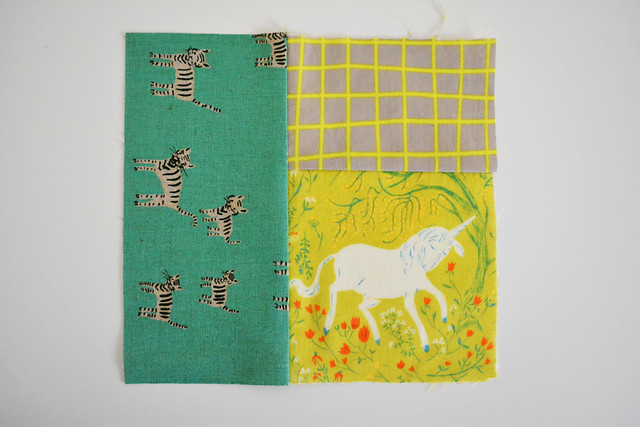
So take a center square and grab a strip - any strip - from the pile. Place the strip along the top edge of the center square, right sides together, with the selvage end hanging off over the edge a bit. Pin.

Tutorial: Wonky Log Cabin Block

Set your stitch length at 2.0 [this means you don't have to backstitch]. Stitch along pinned edge. You only have to sew the length of the center square.

Tutorial: Wonky Log Cabin Block

Note: Normally you don't zig zag when piecing a quilt, but my center square is double gauze, and I know from a previous Terrible Incident that 1/4" seams on double gauze tend to fray completely out during the first quilt washing if they aren't well reinforced, which leads to anger, then weeping, then complete and utter brokenness [though that quilt did end up with some pretty sweet patches]. So I zig zagged.

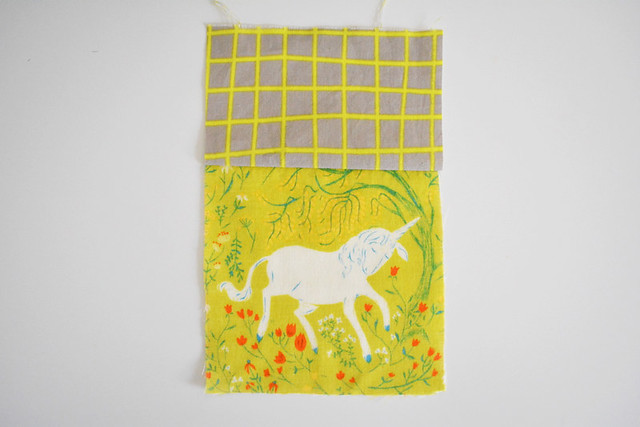
Press the strip away from center.

Tutorial: Wonky Log Cabin Block

Trim both ends even with the edges of the center square.

Tutorial: Wonky Log Cabin Block

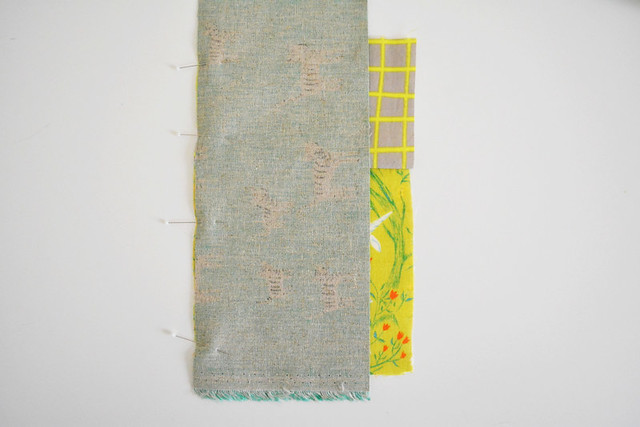
Pick another strip - again, any strip - and align it with the new left edge you just created that includes the center square and strip #1. Pin right sides together, again having the selvage hang over the edge.

Tutorial: Wonky Log Cabin Block

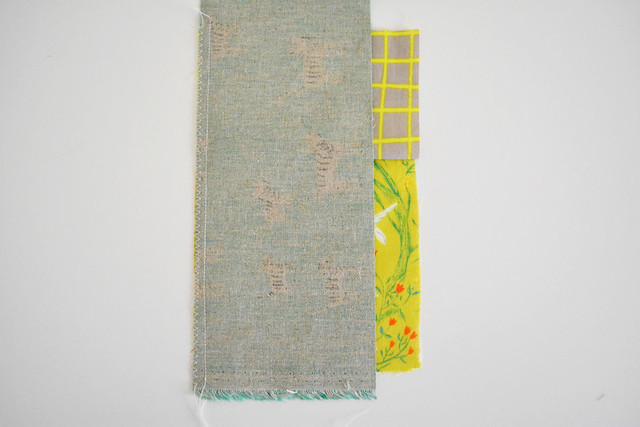
Stitch with a 1/4" seam allowance.

Tutorial: Wonky Log Cabin Block

Repeat the pressing and the trimming like you did on the first strip.

Tutorial: Wonky Log Cabin Block

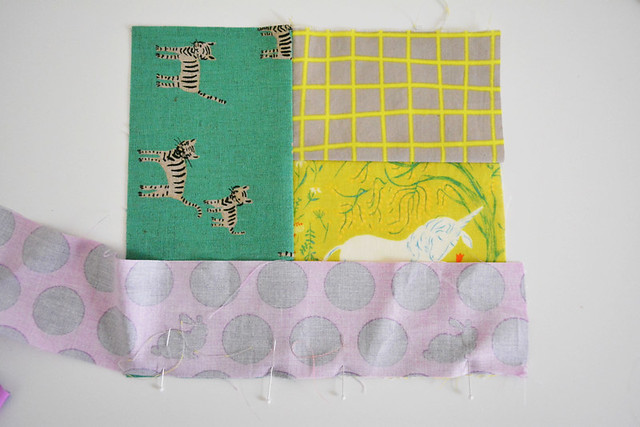
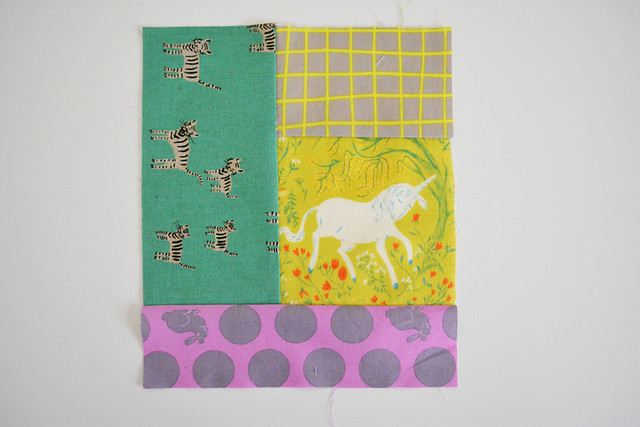
Pick a third random strip - seriously, don't think about it too hard - and align it with the bottom edge, right sides together. Are you sensing a pattern here?

Tutorial: Wonky Log Cabin Block

Press and trim.

Tutorial: Wonky Log Cabin Block

Attach a fourth strip to the final edge. That completes the first pass around the center.

Tutorial: Wonky Log Cabin Block

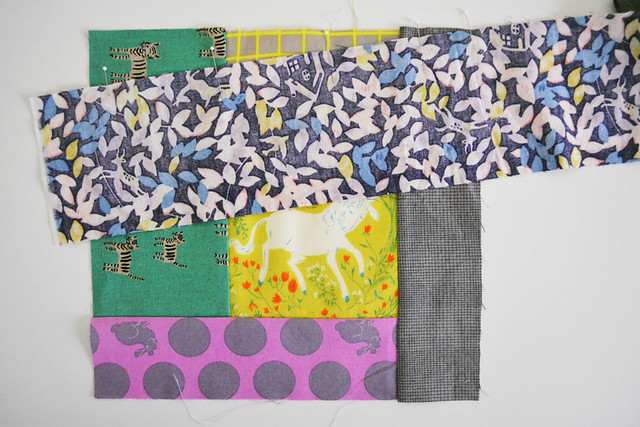
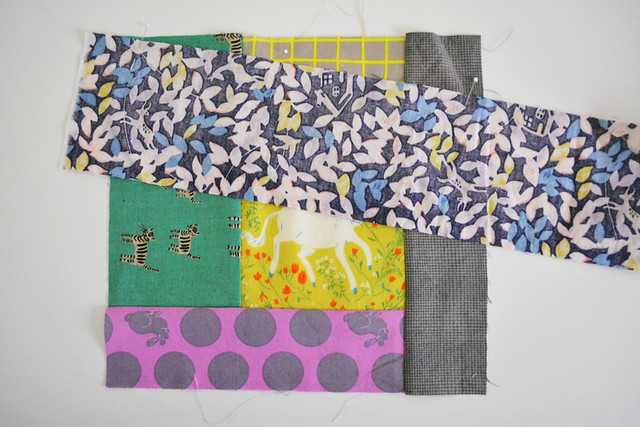
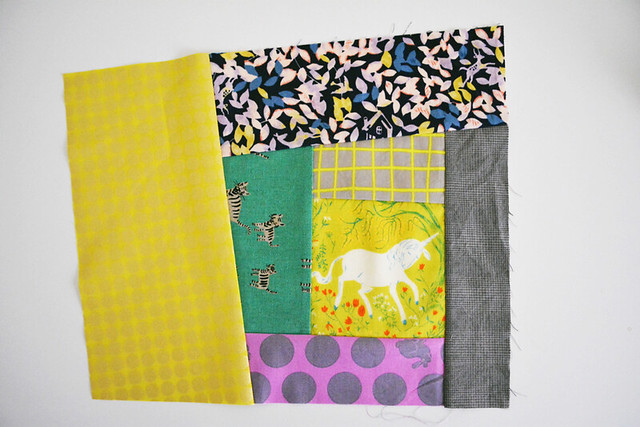
Ok, now it's time to reach down deep and release your inner wonk. We're going to keep attaching strips in the same way, but we're going to start making some of them crooked. On purpose. WHAAAT??

So we're back to the top edge. Pick a strip and place it, right sides together, along the top edge, but lay it at an angle. You could go like this:

Tutorial: Wonky Log Cabin Block

or this:

Tutorial: Wonky Log Cabin Block

YOU ARE A CRUSHER OF PARADIGMS AND A GODDESS OF CHAOS.

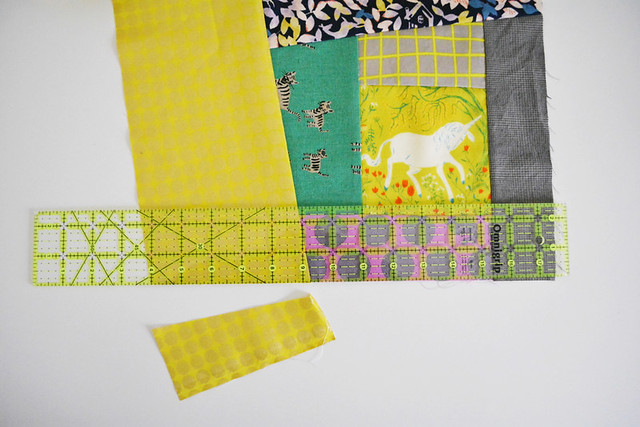
There's really no rule for exactly how crooked to make the wonky strips, except that if you make them too crooked, you're going to start covering up too much of the previous piecing, so keep in mind what's going on under the strip. Also, if you make them just barely crooked, the wonkiness won't be very noticeable in the final project. About 1" [give or take] in from the edge at the crooked end is a good place to start if you need numbers.

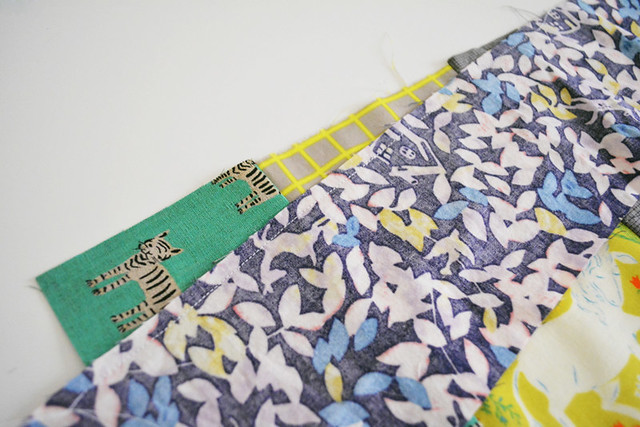
Once pinned, stitch along the crooked strip, 1/4" in from the edge. Your presser foot should have a groove or notch at 1/4" to use as a reference.

Tutorial: Wonky Log Cabin Block

Trim the bottom layer even with the crooked strip.

Tutorial: Wonky Log Cabin Block

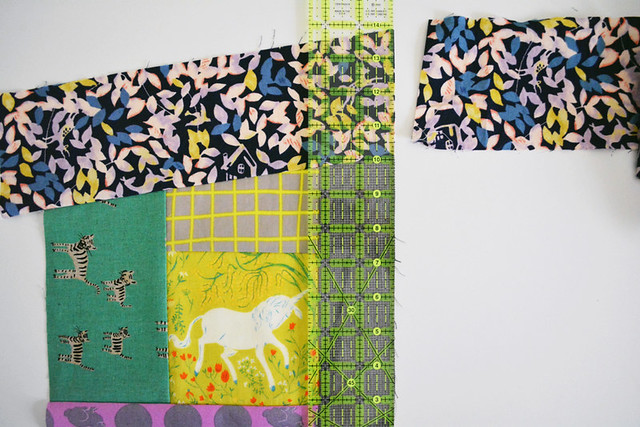
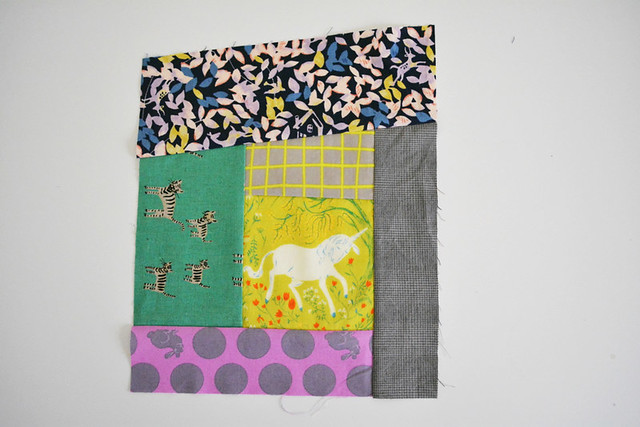
Press the strip away from center. Use a ruler to trim the ends even and straight with the other edges.

Tutorial: Wonky Log Cabin Block

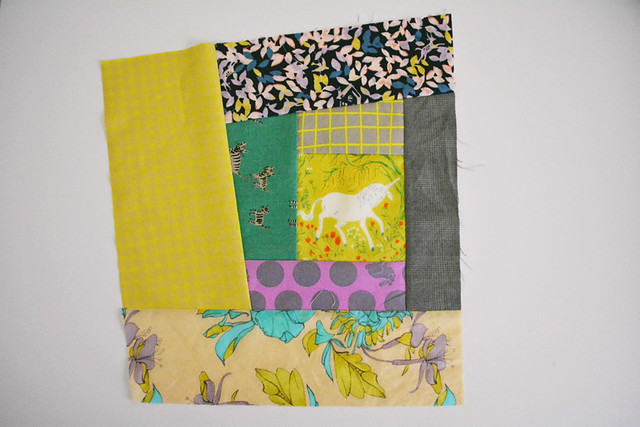
Next edge: same deal. Lay 'er down crooked...

Tutorial: Wonky Log Cabin Block

...stitch, press, trim.

Tutorial: Wonky Log Cabin Block

You don't have to make every strip crooked. It's your quilt and you do what you damn well please. [For instance, I find that laying a 2.5" strip down crooked on top of another 2.5" just makes them both too narrow for my liking.]

Tutorial: Wonky Log Cabin Block

Keep going until your block is big enough to cover a 14" square. I check this by just laying it on top of my cutting mat. I try to keep the center square straight when checking because I like having them straight on the finished quilt. Depending on the combo of widths you choose, you might be done after the second pass, or you might need to keep going a little more. If your block is tall enough but not wide enough, or vice versa, feel free to attach a strip out of order to add the length or width where it's needed.

Also near the end, keep in mind how much you need to add versus which width strip you choose. For example, if your block is only 1" shy of being 14" wide, it would be silly to use one of your 5.5" strips for that edge, because you're just going to end up trimming most of it off anyway. Use a narrower one.

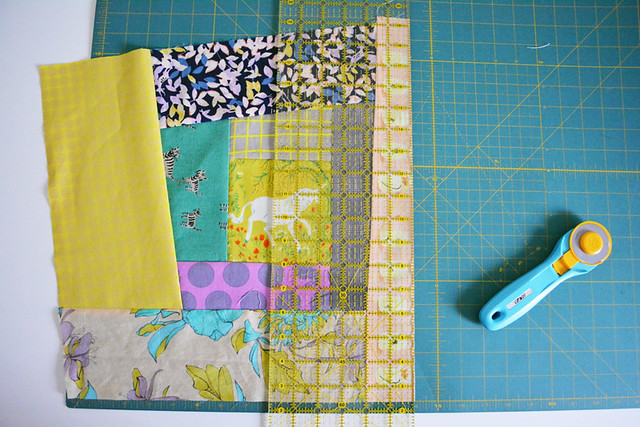
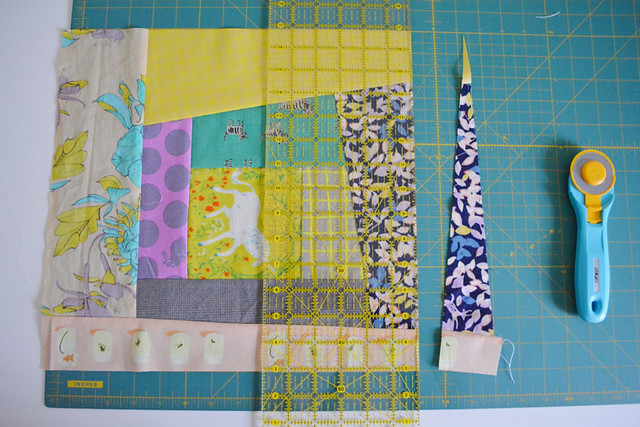
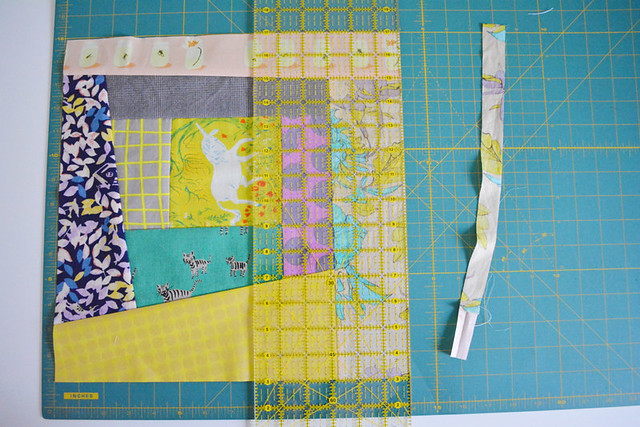
Ok, time to trim. Lay your block over the corner of your cutting mat, with all the edges slightly extending beyond a 14" square grid. Trim the first edge at 14".

Tutorial: Wonky Log Cabin Block

Flip the block 180 degrees, place the trimmed edge at 0, and trim the opposite edge at 14".

Tutorial: Wonky Log Cabin Block

Turn it 90 degrees and trim the other two edges the same way.

Tutorial: Wonky Log Cabin Block

If you totally bomb the trimming, don't worry - just hack off the embarrassing part, go back to your pile of strips, attach some more and retrim. This is seriously the lowest stress quilt ever!

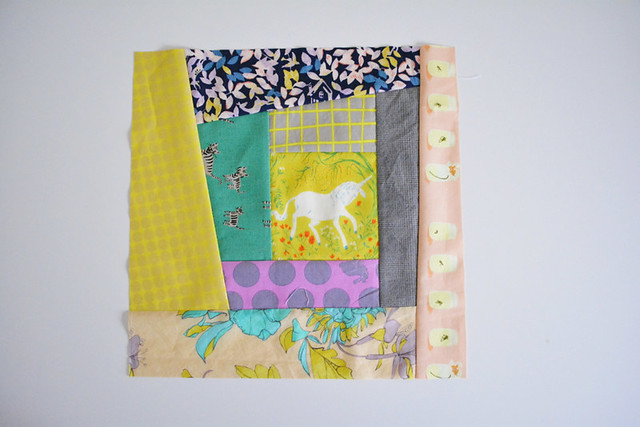
Once it's 14" square, your block is finished!

Tutorial: Wonky Log Cabin Block

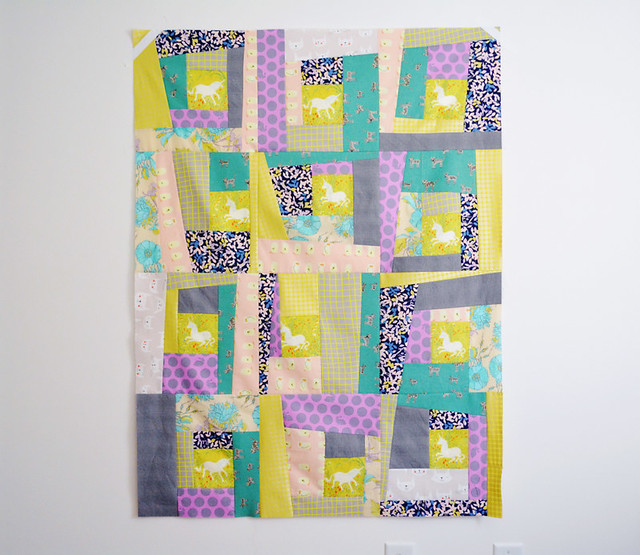
The quilt I made has twelve total blocks. I like to do them assembly line style. It goes much faster, and it also helps prevent accidentally using one type of fabric too often in the same place on the blocks because as you piece each one, it takes that strip out of commission for the rest. So, attach all the first strips at once, press them all, trim them all, return everything to the pile, attach all the second strips at once, etc. It goes pretty fast.

Once you're done, lay them all out and try different arrangements. I usually try to make sure all the fabrics are more or less equally distributed around the quilt. To assist in this task, I employ the highly technical act of squinting at the layout, which actually does help you see if there are a lot of dark or light fabrics clustered together. One of my favorite things about this block is that once you put them together, the fabric starts to make new shapes in some places [for example, the teal tigers in the lower right].

Tutorial: Wonky Log Cabin Block

Once you're pleased with the layout, join the blocks in rows with a 1/4" SA, then join the rows. I highly recommend taking a picture of the layout with your phone in case you get interrupted, or you just forget during the walk to the machine which block goes where [a completely valid scenario].

Quilt and finish as desired. There are tutorials a'plenty for that strewn all across the internet.

Let me know if you have any questions!

LinkWithin

Related Posts with Thumbnails